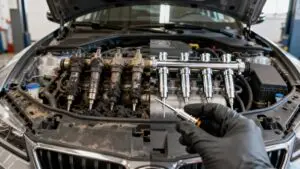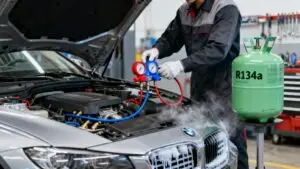





Run this quick vehicle checkup guide in five stages: a 2-minute exterior walkaround, a 5-minute under-hood look, a 3-minute tire and brake check, a 2-minute lights and electrical pass, and a short test drive. The whole routine takes 5 to 15 minutes depending on how thorough you get, and it catches the problems that turn into tow trucks: fluid leaks, worn tires, dying batteries, and brakes that are one bad stop away from trouble.
Here’s the fast version, in order:
- Exterior walkaround (2 minutes): Check for leaks under the car, body damage, cracked glass, wiper condition, and mirror security.
- Tires (2 minutes): Check pressure cold with a gauge, inspect tread depth, and confirm the spare and lug nuts are secure.
- Under-hood (3 to 5 minutes): Check oil level and color, coolant reservoir, brake fluid, and battery terminals.
- Lights (1 to 2 minutes): Test headlights, brake lights, and turn signals, ideally with a second person watching.
- Test drive (2 to 3 minutes): Listen for noises, test the brakes at low speed, and watch for pulling or dashboard warning lights.
Park on level ground, set the parking brake, and let the engine cool before you touch anything under the hood. Wheel chocks are a smart addition if you’re on any kind of slope. And if you find a fluid leak you can’t identify, smell something smoky, hear grinding when you brake, or feel the steering go loose, stop the checkup right there and call a mechanic. Those aren’t DIY problems. They’re “get it looked at today” problems.
Table of Contents
- What Is a Quick Vehicle Checkup, and Why Do It Yourself?
- Exterior Walkaround: A 2-to-5-Minute Visual Scan
- What Under-the-Hood Checks Matter Most?
- Tires and Brakes: The Two Systems That Actually Stop You
- Lights, Fuses, and Simple Electrical Checks
- Quick Test Drive: What to Listen and Feel For
- Tools Worth Keeping in Your Trunk
- How Often Should You Run This Check?
- When to Bring Your Car to Kwik Kar Oil Change & Auto Care
- Key Takeaways: What to Remember and Do Next
- Sources
- FAQ
What Is a Quick Vehicle Checkup, and Why Do It Yourself?
A quick vehicle checkup is a short, owner-run inspection that flags visible or obvious mechanical issues before they turn into breakdowns. It’s not a substitute for a professional multi-point inspection. Think of it as triage: you’re looking for the loud, visible warning signs that something needs attention, not diagnosing internal engine problems.
Shops call the deeper version a multi-point inspection, and it usually covers everything from suspension components to fluid contamination levels using tools you don’t have in your garage. Your version, the quick vehicle checkup guide you’re reading now, covers the same categories at a surface level: fluids, tires, lights, and brakes. Doing this monthly, and always before a road trip, means you catch small problems while they’re still cheap.
Exterior Walkaround: A 2-to-5-Minute Visual Scan
Walk the car clockwise, starting at the front bumper. This order matters less than the habit of doing it the same way every time, since consistency is what makes a subtle change (a new stain, a fresh scuff) jump out at you.
- Front bumper and hood: Look for cracks, dents, or fresh chips in the windshield.
- Driver’s side: Check the mirror for looseness and the tire for obvious damage or low pressure.
- Rear: Look under the car for puddles or wet spots, and check the trunk area for the spare tire.
- Passenger side: Repeat the mirror and tire check.
- Back to front: Check wiper blade condition (cracked or torn rubber means replace them) and test the horn.
Lights get a two-person check if you can swing it: have someone stand behind the car while you tap the brake pedal and cycle through turn signals. If nobody’s around, back up toward a reflective surface, like a garage door or storefront window, and watch the reflection.
A puddle under the engine bay usually means something specific. Clear water is probably just AC condensation and nothing to worry about. Anything colored, oily, or sweet-smelling deserves a closer look, and Kwik Kar Oil Change & Auto Care’s guide on identifying fluid leaks breaks down what each color usually means. Do not drive the vehicle if you spot major fluid loss or any sign of structural damage to the frame or suspension mounts.
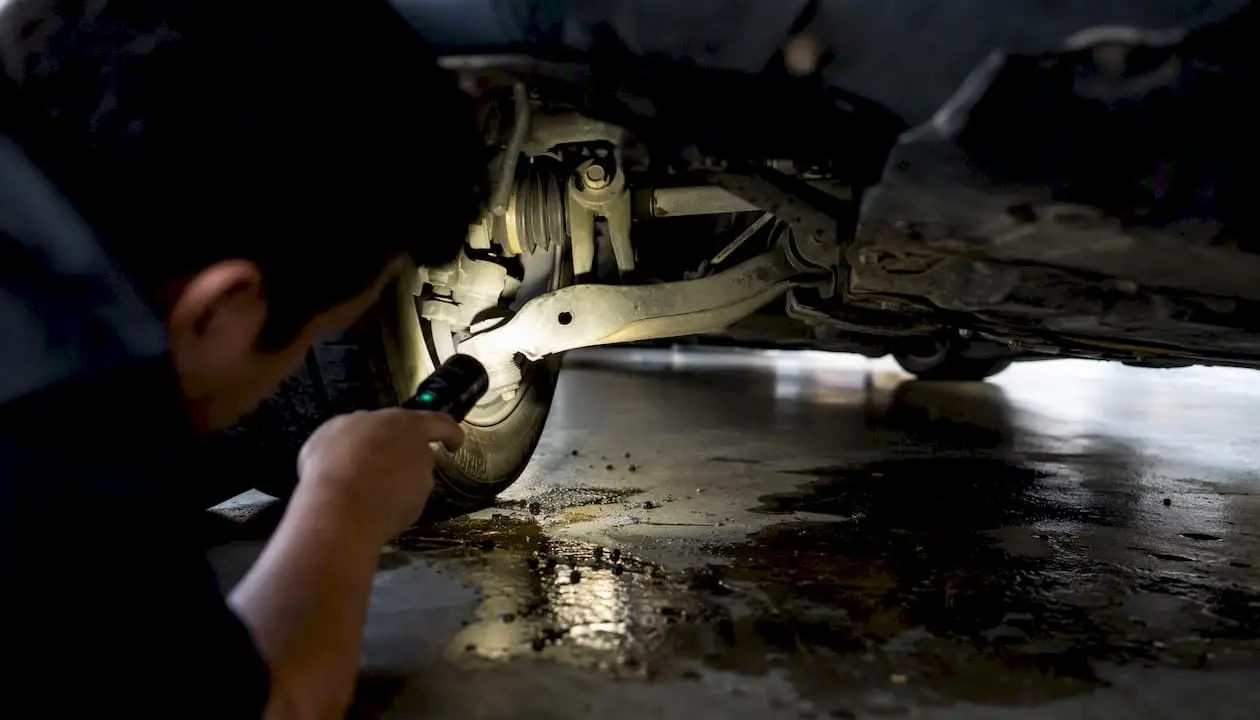
Pro Tip: Use your phone’s flashlight to check the underside of the wheel wells and the pavement directly under the engine. Fresh fluid trails and debris show up far more clearly with a direct light than they do in ambient daylight, especially in a shaded garage.
What Under-the-Hood Checks Matter Most?
Pop the hood only after the engine has had time to cool, and never open a hot radiator cap. Pressurized coolant can spray out at close to boiling temperature, and that’s not a risk worth taking to save two minutes.
- Oil level and color. Pull the dipstick, wipe it clean, reinsert, then pull it again to read the level. Amber to light brown is normal; if it looks like dark tea or has a burnt smell, that’s a sign the oil has broken down and needs changing soon. Kwik Kar Oil Change & Auto Care’s rundown of signs your car needs an oil change covers the smell and color cues in more depth.
- Coolant reservoir. Check the level against the “min” and “max” lines printed on the plastic tank. It should look clean, not murky or full of floating particles.
- Brake fluid. The reservoir is usually near the firewall on the driver’s side. Fluid should be light and clear to slightly yellow.
- Battery terminals. Look for white or greenish crust around the posts, which signals corrosion buildup.
- Belts and hoses. Check belts for cracking or glazing, and hoses for soft spots, swelling, or visible seepage at the connections.
- Air filter. Pop the housing open (usually two or three clips) and hold the filter up to light. If you can’t see light through it, it’s due for replacement.
Fluid color tells you almost everything you need to know at a glance. Dark, tea-colored brake fluid usually means moisture has worked its way into the system over time, and Consumer Reports’ used-car inspection guide notes that murky or particulate-filled coolant typically points to corrosion or additive breakdown inside the cooling system. Neither is an emergency by itself, but both are reasons to get the fluid checked at your next service.
Stop the checkup and arrange a tow if you see active coolant spraying, smell raw fuel, or find oil pooling heavily under the engine rather than just a light stain. Those symptoms suggest active failure, not gradual wear, and driving on them risks stranding you somewhere worse than your driveway.
Pro Tip: Keep a small notebook or phone note with your oil color and coolant level from each check. Comparing this month’s reading to last month’s is how you catch a slow leak before it becomes a sudden one.
Tires and Brakes: The Two Systems That Actually Stop You
Tire pressure should always be checked cold, meaning before the car has been driven more than a mile or two, and always against the number on the driver’s door jamb placard rather than the number molded into the tire’s sidewall. That sidewall figure is the maximum pressure the tire can hold, not the recommended running pressure for your vehicle.
Temperature swings hit tire pressure harder than most drivers expect. According to the Tire Care and Safety Guide, pressure drops roughly 1 psi for every 10°F the outside temperature falls. A tire sitting at 32 psi in September can read 28 psi by December without a single mile driven. That’s also why a tire pressure warning light isn’t a reliable early-warning system on its own. The same guide notes that TPMS sensors often don’t trigger until a tire is already significantly underinflated, so a monthly gauge check catches problems the dashboard light misses entirely.
Tread depth gets the classic penny test: insert a penny into the tread groove with Lincoln’s head pointing down. If you can see the top of his head, the tread is worn past the safe minimum and the tire needs replacing. Uneven wear across the tread, more wear on one edge than the other, usually points to an alignment or suspension issue rather than a tire defect.
For brakes, a quick visual check through the wheel spokes can tell you a lot:
- Pad material should be noticeably thicker than the metal backing plate behind it.
- Grinding or a metal-on-metal sound while braking means the pads are gone and you’re braking on metal.
- A pulsing sensation through the pedal usually points to a warped rotor.
- Deep scoring or a bluish tint on the rotor surface suggests overheating damage.
Brake pads generally last 25,000 to 50,000 miles, but that range shifts a lot based on driving style and terrain, so a visual check at every oil change catches wear before it becomes a hazard. Kwik Kar Oil Change & Auto Care’s guide to brake pad wear signs walks through what to listen and feel for if you’re not confident reading pad thickness by eye. A missing spare tire or lug nuts that feel loose to a hand check both need attention before you drive anywhere, not just noted for later.
Lights, Fuses, and Simple Electrical Checks
This part of your quick vehicle checkup guide moves fast, usually under three minutes, because you’re mostly just watching and listening rather than getting your hands dirty.
Start with the brake lights. Have someone stand behind the car while you press the pedal, or back up to a reflective window if you’re solo. Cycle through both turn signals and check the hazards while you’re at it. A bulb that’s out is a five-minute fix; a bulb that keeps blowing repeatedly is usually a wiring or fuse issue that deserves a shop’s attention.
Fuses are simple to check if you know where the box is (check your owner’s manual, since location varies by make). With the engine off, pull the suspect fuse and hold it up to light. A broken filament inside means it’s blown. Replace it with a fuse of the exact same amp rating, never a higher one, since that rating exists to protect the wiring, not just the component.
Battery terminal cleaning is straightforward but deserves a couple of precautions:
- Never touch both terminals at once with a metal tool.
- Wear eye protection, since corrosion can flake off unexpectedly.
- A mix of baking soda and water on an old toothbrush works fine for light corrosion.
If you find yourself replacing the same fuse more than once, or dashboard electronics start glitching (screens flickering, warning lights that don’t match any real symptom), that’s a signal for professional diagnosis rather than another fuse swap.
Quick Test Drive: What to Listen and Feel For
Once the visual checks are done, a short test drive, even just around the block, tells you things a stationary inspection can’t.
- Low-speed noise check. Roll forward slowly with the windows down and listen for grinding, clicking, or knocking.
- Brake test. At low speed, brake firmly and note any pulsing, grinding, or pulling to one side.
- Steering check. On a straight, flat stretch, briefly let go of the wheel (hands hovering, not fully off) to see if the car drifts.
- Shift check. If you drive an automatic, confirm shifts feel smooth, not delayed or jerky.
- Dashboard scan. Glance at the instrument cluster for any warning light that wasn’t there before.
If you’re planning a longer trip, this same routine scales up into a more formal pre-trip vehicle inspection, which adds a few extra checks specific to long highway stretches.
Certain findings on this drive mean stop now, not “keep an eye on it”:
- Grinding brakes: Stop driving and arrange a tow rather than driving to the shop yourself.
- Strong vibration: Slow down immediately and check for a damaged tire or loose wheel.
- Persistent steering pull: Get an alignment or suspension check before driving further than necessary.
- Rising temperature gauge: Pull over safely and let the engine cool completely before checking coolant.
If you do need to pull over, get fully off the roadway, turn on hazards, and when you call the shop, have three things ready: what the symptom was, when it started, and what you already checked. That context saves diagnostic time and often saves you money on the visit.
Tools Worth Keeping in Your Trunk
You don’t need a full toolbox to run this checkup reliably. A handful of cheap items cover almost everything above:
- Digital tire gauge (about $10): far more accurate than the twist-style gauges, and worth it given how much pressure readings matter.
- Flashlight or phone light: for underbody leaks and wheel well inspections.
- Basic socket wrench set: for lug nut checks and battery terminal work.
- Disposable gloves: keep brake dust and battery corrosion off your hands.
- Small funnel: makes topping off fluids far less messy.
- Zip ties and a small drain pan: for quick fixes and catching drips during inspection.
- Spare fuses: a small assortment covering the common amp ratings for your vehicle.
- Battery terminal brush (about $5): speeds up corrosion cleaning significantly.
- Portable 12V air compressor (optional, $30 and up): handy if you’re topping off tires away from a gas station.
Basic DIY readiness like this is genuinely inexpensive. As Quartz has reported, a shop’s hourly labor rate often runs $100 to $200, so a $10 gauge that catches a slow leak before a blowout pays for itself the first time you use it. Store the small items in a zippered pouch in the trunk, and keep anything heavier, like the socket set, secured so it doesn’t roll around and rattle on rough roads.
How Often Should You Run This Check?
Frequency matters more than most owners think, and it should track your mileage and driving habits, not just a date on the calendar.
| Interval | What to check |
|---|---|
| Monthly | Tire pressure and tread, fluid levels, exterior lights, wiper condition |
| Before any road trip | Full walkaround plus tire tread depth, spare tire, and a test drive |
| Every oil change | Brake pad thickness, belt condition, air filter |
| Every six months | Deeper owner checks per your manufacturer’s schedule: suspension components, battery health, hose condition |
That monthly and six-month rhythm lines up with what Ford’s owner documentation recommends, and most manufacturers publish something similar. Bridgestone’s maintenance checklist separates these into short-term items (fluids, tires, lights) and long-term items (transmission fluid, shocks, coolant exchanges), which is a useful mental model: your quick check handles the short-term column, and a shop visit handles the rest.
Certain findings should skip the “wait for the next scheduled check” approach entirely and go straight to a professional multi-point inspection:
- Any active fluid leak you can’t identify.
- Grinding or metal-on-metal sounds while braking.
- Tire pressure that’s consistently low even after refilling, which suggests a slow leak or valve stem issue.
- An engine misfire, rough idle, or a check engine light paired with reduced power (“limp mode”).
When you call or bring the car in, give the service advisor a clear rundown: the symptom, when you first noticed it, current mileage, and anything you already checked yourself. It cuts diagnostic time and usually gets you a more accurate quote.
Why this quick check actually matters
I’ve seen plenty of vehicles come in for a “sudden” breakdown that wasn’t sudden at all. It was a slow oil leak that had been dripping for weeks, or a tire that had been losing a pound of pressure every few days until it finally gave out on the highway. The owners who catch these things early are almost always the ones who’ve built a habit of looking, not the ones who happened to get lucky.
One thing I tell every customer: note your baseline. After you run this checkup for the first time, write down what your engine sounds like at idle, what the oil looks like, what your tire pressures read. That baseline is what makes the next check useful, because you’re not just looking for problems in isolation, you’re looking for change. A slightly different sound or a slightly darker fluid color means a lot more when you know what “normal” looked like a month ago.
When to Bring Your Car to Kwik Kar Oil Change & Auto Care
Some findings from your quick check are simply outside DIY territory, and that’s fine. Grinding brakes, a dashboard warning light paired with reduced power, a persistent steering pull, or fluid you can’t identify all call for a professional multi-point inspection rather than another round of guesswork in your driveway. The same goes for scheduled major services like timing belt replacement or transmission fluid changes, where the tools and torque specs go well beyond a home garage setup.
Kwik Kar Oil Change & Auto Care is the option that turns your quick checklist into a full diagnosis without the runaround. Technicians hold ASE and RepairPal certification, pricing is quoted upfront before any work starts, and appointments move fast enough to fit into a workday rather than eating your whole weekend. If you found something during your checkup, jot down the symptom, when it started, and your current mileage before you call. It’s the same information you’d give a shop after any test drive, and it gets you a faster, more accurate diagnosis. Busy owners who can’t always plan ahead can also check Kwik Kar’s walk-in maintenance options for a same-day inspection without a scheduled slot.
Key Takeaways: What to Remember and Do Next
Running a 5-to-15-minute checkup monthly, before road trips, and at every oil change catches most vehicle problems while they’re still cheap to fix.
| Point | Details |
|---|---|
| Run the full checkup monthly | Cover exterior, tires, under-hood fluids, and lights in one 5-to-15-minute pass. |
| Check tires cold, against the placard | Use the door jamb PSI number, not the tire sidewall maximum, and expect pressure to drop about 1 psi per 10°F. |
| Know the stop-now signals | Grinding brakes, active fluid leaks, and a persistent steering pull all mean stop driving and call for help. |
| Keep a simple log | Note oil color, tire pressure, and any unusual sounds each month so you can spot change early. |
| Call Kwik Kar Oil Change & Auto Care for anything beyond visual checks | Certified technicians handle diagnostics and repairs your quick check can flag but not fix. |
Sources
- Tire Care and Safety Guide
- Bridgestone — Ultimate car maintenance checklist
- Quartz — DIY car maintenance tasks save money
Your own owner’s manual and the driver’s door jamb placard remain the final word on vehicle-specific numbers, especially tire PSI, since those figures vary by model and even by trim level.
FAQ
How do I do a quick inspection on a car?
Run a five-part routine: exterior walkaround, tire pressure and tread check, under-hood fluid check, lights test, and a short test drive. The full sequence takes 5 to 15 minutes.
What should I check before driving anywhere?
Check tire pressure and visible tread, all exterior lights, fluid levels under the hood, wiper condition, and mirror security, then take a brief listen for unusual noises before pulling out.
What are the basic steps for a pre-trip inspection?
Walk around the car checking for leaks and damage, verify tire pressure and tread against the door jamb placard, check all lights with a helper, confirm the spare and lug nuts are secure, check fluid levels, and take a short test drive to catch any pulling or noise before committing to a long drive.
What should I check on my vehicle daily?
Daily checks can be as simple as a glance for new leaks, tire condition, and dashboard warning lights, saving the full fluid and light check for a weekly or monthly pass instead.
When should I take my car to a shop instead of checking it myself?
Bring it to Kwik Kar Oil Change & Auto Care for any grinding brakes, unidentified fluid leaks, persistent steering pull, or a check engine light paired with reduced power. Those symptoms need diagnostic tools and expertise beyond a visual home check.