

That new rattle from the front of the engine usually starts the same way. You hear it on cold start, it fades a little, and you hope it’s something minor. Then the check engine light comes on, the engine feels lazy, or it starts taking longer to fire up.
A timing chain problem is one of those repairs that punishes delay. The chain keeps the crankshaft and camshafts synchronized so the pistons and valves move in the right sequence. When that relationship starts to drift, the engine doesn’t just run poorly. It can damage itself in a hurry.
Owners usually end up stuck between two bad options: generic DIY advice that skips the hard parts, or repair estimates that don’t explain what is being replaced. A good timing chain replacement guide should do better than that. It should tell you what matters, where the job goes wrong, and when it makes more sense to hand it to a professional.
Your Complete Timing Chain Replacement Guide
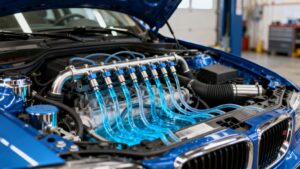
A timing chain lives in a harder environment than is commonly understood. It runs inside the engine, relies on clean oil, and works with guides, tensioners, and sprockets that all have to stay in sync. That’s why chain noise is never something to brush off.
Timing chains are designed to last between 80,000 and 120,000 miles, but many can last the life of the vehicle with proper maintenance. Most OEMs don’t set a fixed replacement interval, and professional replacement typically runs from $1,000 to $2,500 according to this timing chain replacement reference. That lack of a fixed schedule is where many owners get tripped up. They assume no interval means no risk.
What the timing chain actually does
Think of the timing chain as the engine’s mechanical link between bottom-end rotation and top-end valve action. The crankshaft turns. The camshafts open and close valves. The chain keeps those parts working in lockstep.
When that timing slips, several things can happen:
- Valve timing drifts: The engine may idle rough, hesitate, or misfire.
- The chain slaps the cover or guides: You hear rattle, whine, or metallic noise.
- Major internal contact becomes possible: On some engines, pistons and valves can meet if timing jumps.
That’s why chain work isn’t comparable to replacing an accessory belt. The stakes are much higher.
Why some chains fail early
Poor oil service is the most common pattern behind premature wear. Dirty oil stops protecting the chain, tensioner, and guides the way it should. Harsh use also matters. Stop-and-go traffic, towing, extreme heat, high mileage, and age all raise the odds that a once-quiet chain assembly will start asking for attention.
Practical rule: If a chain-driven engine gets noisy, runs poorly, and has a weak maintenance history, assume the problem is serious until inspection proves otherwise.
If you’re still figuring out whether your engine uses a chain or a belt, this quick timing belt or timing chain overview helps clear that up before you buy parts or schedule work.
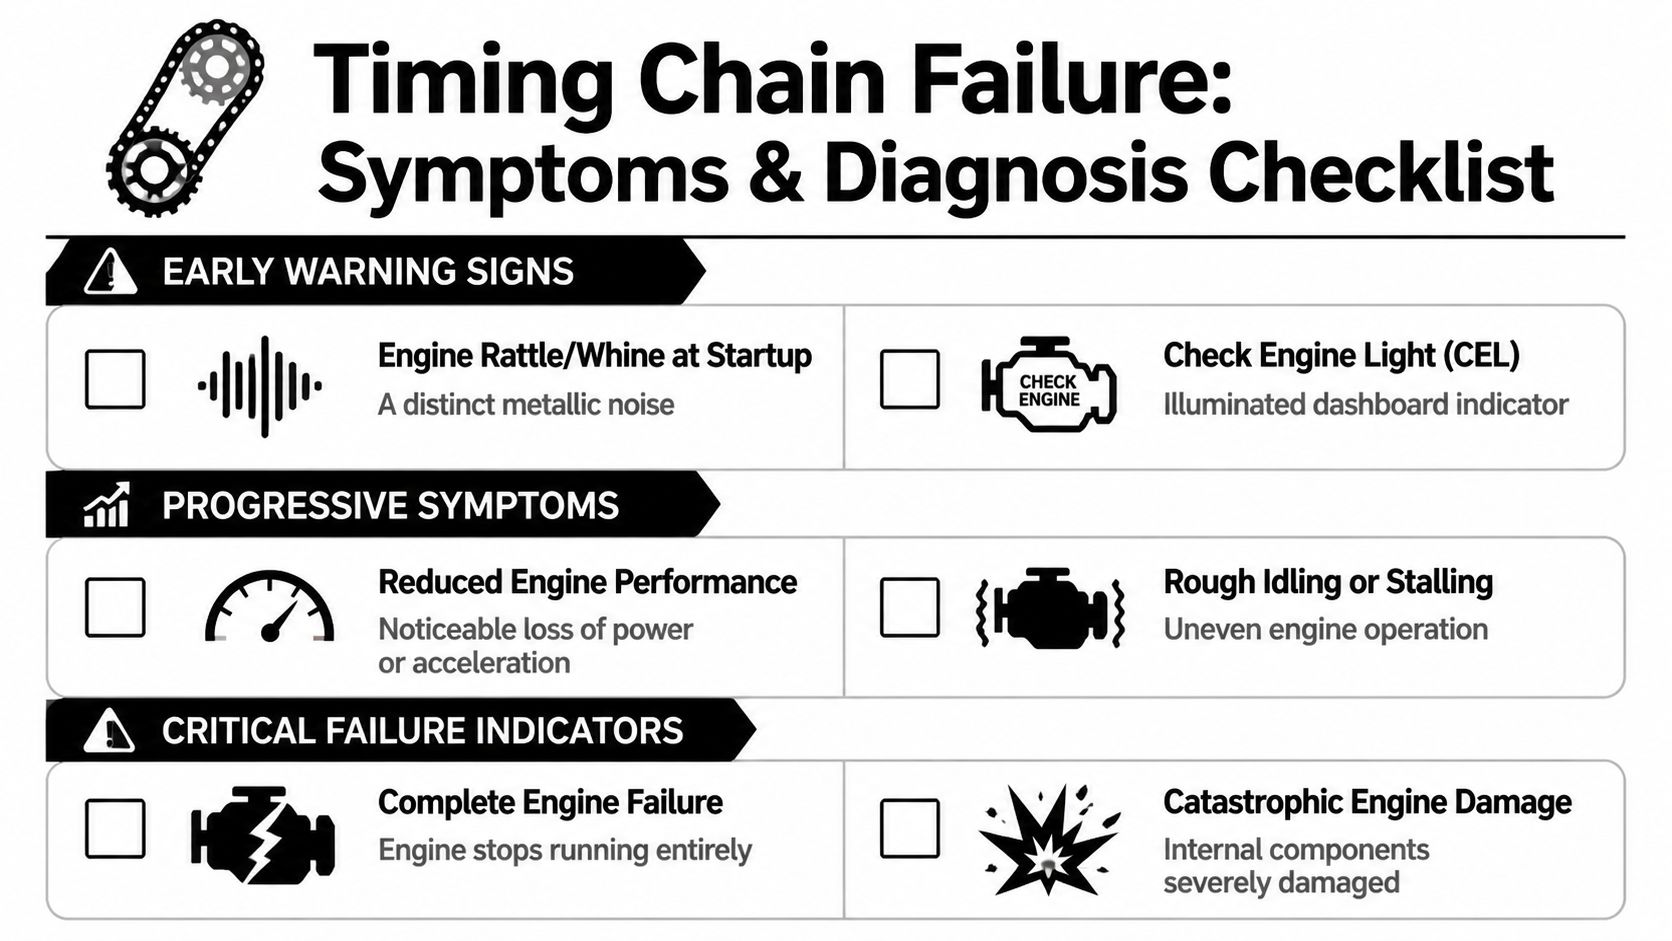
Is Your Timing Chain Failing? Symptoms and Diagnosis
The pattern matters more than any single symptom. A failing chain system usually gives warnings in layers. It starts with sound, moves into drivability issues, and then turns into a no-start or internal damage problem if nobody intervenes.
Industry data shows timing chain replacements increased by 60% in a single year, from 0.35% in 2018 to 0.56% in 2019 in this timing drive replacement trend report. That matters because it confirms what shops already see at the bay door. Chain issues aren’t rare edge cases anymore.
 warning signs of a failing car timing chain.” />
Early warning signs
The most common first clue is noise from the timing cover area. That often points to a loose chain, worn guide, or failing tensioner. Owners describe it as a rattle, light clatter, or steady whine from the front of the engine.
A startup rattle deserves attention even if it goes away. Oil pressure may be taking a moment to stabilize a weak tensioner, which lets the chain run loose briefly. A persistent metallic sound is worse. That usually means the chain isn’t riding where it should.
Other early signs can include:
- Check engine light: Timing correlation faults can show up before the engine feels terrible.
- Hard starting: The engine may crank longer because valve timing is no longer precise.
- Idle vibration: A chain system that’s drifting can make the engine feel rough at a stop.
If your dash light is on along with noise or poor running, this service engine light guide helps explain why that combination shouldn’t be ignored.
Progressive symptoms
Once the chain, guides, or tensioner wear further, the engine usually tells on itself in drivability. Misfires show up. Throttle response gets dull. Fuel delivery and ignition can still be fine, but incorrect valve timing makes the whole engine feel off.
Watch for this group together:
- Misfires and sluggishness: The engine feels flat or uneven under load.
- Rough idle or shaking: Slack in the chain can upset timing enough to make the engine stumble.
- Repeated noise from the front cover: The problem is no longer occasional.
A timing chain noise that gets louder over time rarely fixes itself. It usually means the repair is becoming more expensive.
Critical failure indicators
The most dangerous stage is when drivers keep going after the warning signs pile up. By then, the engine may still run, but it’s operating on borrowed time.
The most serious signs include:
| Symptom | What it suggests |
|---|---|
| No-start condition | Timing may have jumped far enough that the engine can’t run correctly |
| Persistent misfire with severe roughness | Mechanical timing may be badly out of range |
| Loud mechanical clatter | Guide or tensioner failure may be allowing chain slap |
| Rapid worsening after initial noise | Failure is progressing, not stabilizing |
The reason professionals take these symptoms seriously is simple. Ignoring them can lead to catastrophic engine failure. Once a chain jumps far enough, the repair conversation can move from chain service to engine replacement.
Essential Tools and Parts for Timing Chain Replacement
A lot of timing chain jobs get into trouble before the first bolt comes out. The owner has a basic tool set, a bargain kit, and a video that makes the repair look straightforward. Then the crank bolt will not break loose, the engine mount blocks the front cover, or the camshafts move once tension comes off the chain. That is usually the point where a planned weekend repair turns into a tow bill.
Tool access and parts quality decide whether this job stays controlled or gets expensive fast. If you are comparing DIY against a shop quote in Fort Worth, include the cost of specialty tools, replacement fluids, and the possibility that your engine may need one-time-use hardware. Those details are what separate a realistic budget from wishful thinking.
The tools you actually need
Start with the factory procedure for your exact engine, then build the tool list around it. A small-block domestic truck engine and a turbocharged European four-cylinder can both have timing chains, but the support equipment and timing setup can be very different.
Core tools for nearly any timing chain job
- Torque wrench: Cover bolts, guide bolts, tensioners, and cam or crank hardware all need correct torque. Too loose causes leaks or movement. Too tight strips threads or distorts parts.
- Full socket and wrench set: Deep and shallow sockets both come up, especially around covers, accessories, and mounts.
- Breaker bar: Crankshaft bolts are often extremely tight.
- Drain pans and fluid handling tools: Many engines require draining coolant, oil, or both.
- Scrapers, brake cleaner, and lint-free rags: Clean sealing surfaces matter. A rushed cleanup is how fresh repairs start leaking.
Tools that are common on many engines
- Camshaft locking or holding tools: Many modern engines should not be timed by eye.
- Crankshaft holding or positioning tools: Helpful, and on some models required, to keep the crank exactly where it belongs during service.
- Engine support bar or support fixture: Necessary when a motor mount passes through the timing cover area.
- Harmonic balancer puller: Often needed before the front cover can come off.
Tools that depend on the model
- Seal installers
- Pullers for stuck sprockets or balancers
- Special sockets for crank or cam fasteners
- A scan tool for post-repair checks and clearing timing-related faults
Some engines add another catch. Ford EcoBoost applications, GM high-feature V6 engines, BMW and MINI timing setups, and several Nissan and VW engines can have model-specific holding fixtures or procedures that are easy to underestimate. That is one of the biggest gaps between generic DIY guides and real-world repair planning.
Shop-floor reality: If the service information calls for pins, holding fixtures, or an engine support bar, trying to mark parts and put them back “close enough” is how bent valves and no-starts happen.
The parts list that makes sense
Opening the front of the engine is where labor adds up. Replacing only the chain while leaving worn guides, an aging tensioner, and hardened seals in place usually saves money for a few weeks, not for the life of the repair.
A sensible parts list usually includes:
- Timing chain
- Chain guides
- Hydraulic or spring-loaded tensioner
- Sprockets, if the kit includes them or wear is visible
- Front cover gasket set and front crank seal
- Valve cover gasket, if removed for access
- Fresh oil and filter
- Coolant, if drained
- Manufacturer-required single-use bolts or fasteners
That last item gets overlooked all the time. Some cam and crank bolts are torque-to-yield. Reusing them can risk incorrect clamping force, fastener failure, or a comeback you do not want.
OEM versus aftermarket parts
Parts choice is not just about price. It is about whether the kit matches the engine, whether the guides and tensioner are built well, and whether all the sealing pieces and hardware are included.
| Factor | OEM Parts | High-Quality Aftermarket Parts |
|---|---|---|
| Fitment | Usually the benchmark for exact fit | Often good if the brand has a proven record |
| Kit completeness | May require buying pieces separately | Often sold as a full kit |
| Cost | Usually higher | Usually lower |
| Consistency | Helpful on engines sensitive to design changes | Good on common applications with known-good kits |
| Availability | Sometimes dealer order only | Often easier to source quickly |
| Best use case | Engines with known timing hardware issues or strict fit requirements | Budget-conscious repairs where the brand and kit contents are verified |
In the shop, I am more comfortable using OEM or very carefully chosen aftermarket parts on engines known for timing sensitivity. European applications and some direct-injected turbo engines fall into that group more often. On many domestic engines, a proven full kit can be a reasonable choice if it includes guides, tensioner, seals, and any required hardware.
Where owners save money wisely
The smart place to save money is planning. Price the full kit, the fluids, the sealants the procedure calls for, the specialty tools you do not already own, and the value of your time. Then compare that total with a professional estimate.
The risky place to save money is cutting the repair scope. Skipping guides, reusing questionable tensioners, or buying the cheapest chain-only kit can leave you with the same rattle, an oil leak, or a timing fault after all that labor. In Fort Worth, that usually means paying twice. Once for the parts you should have installed the first time, and again for the labor to reopen the engine.
Buy the complete repair path, not the cheapest box on the shelf.
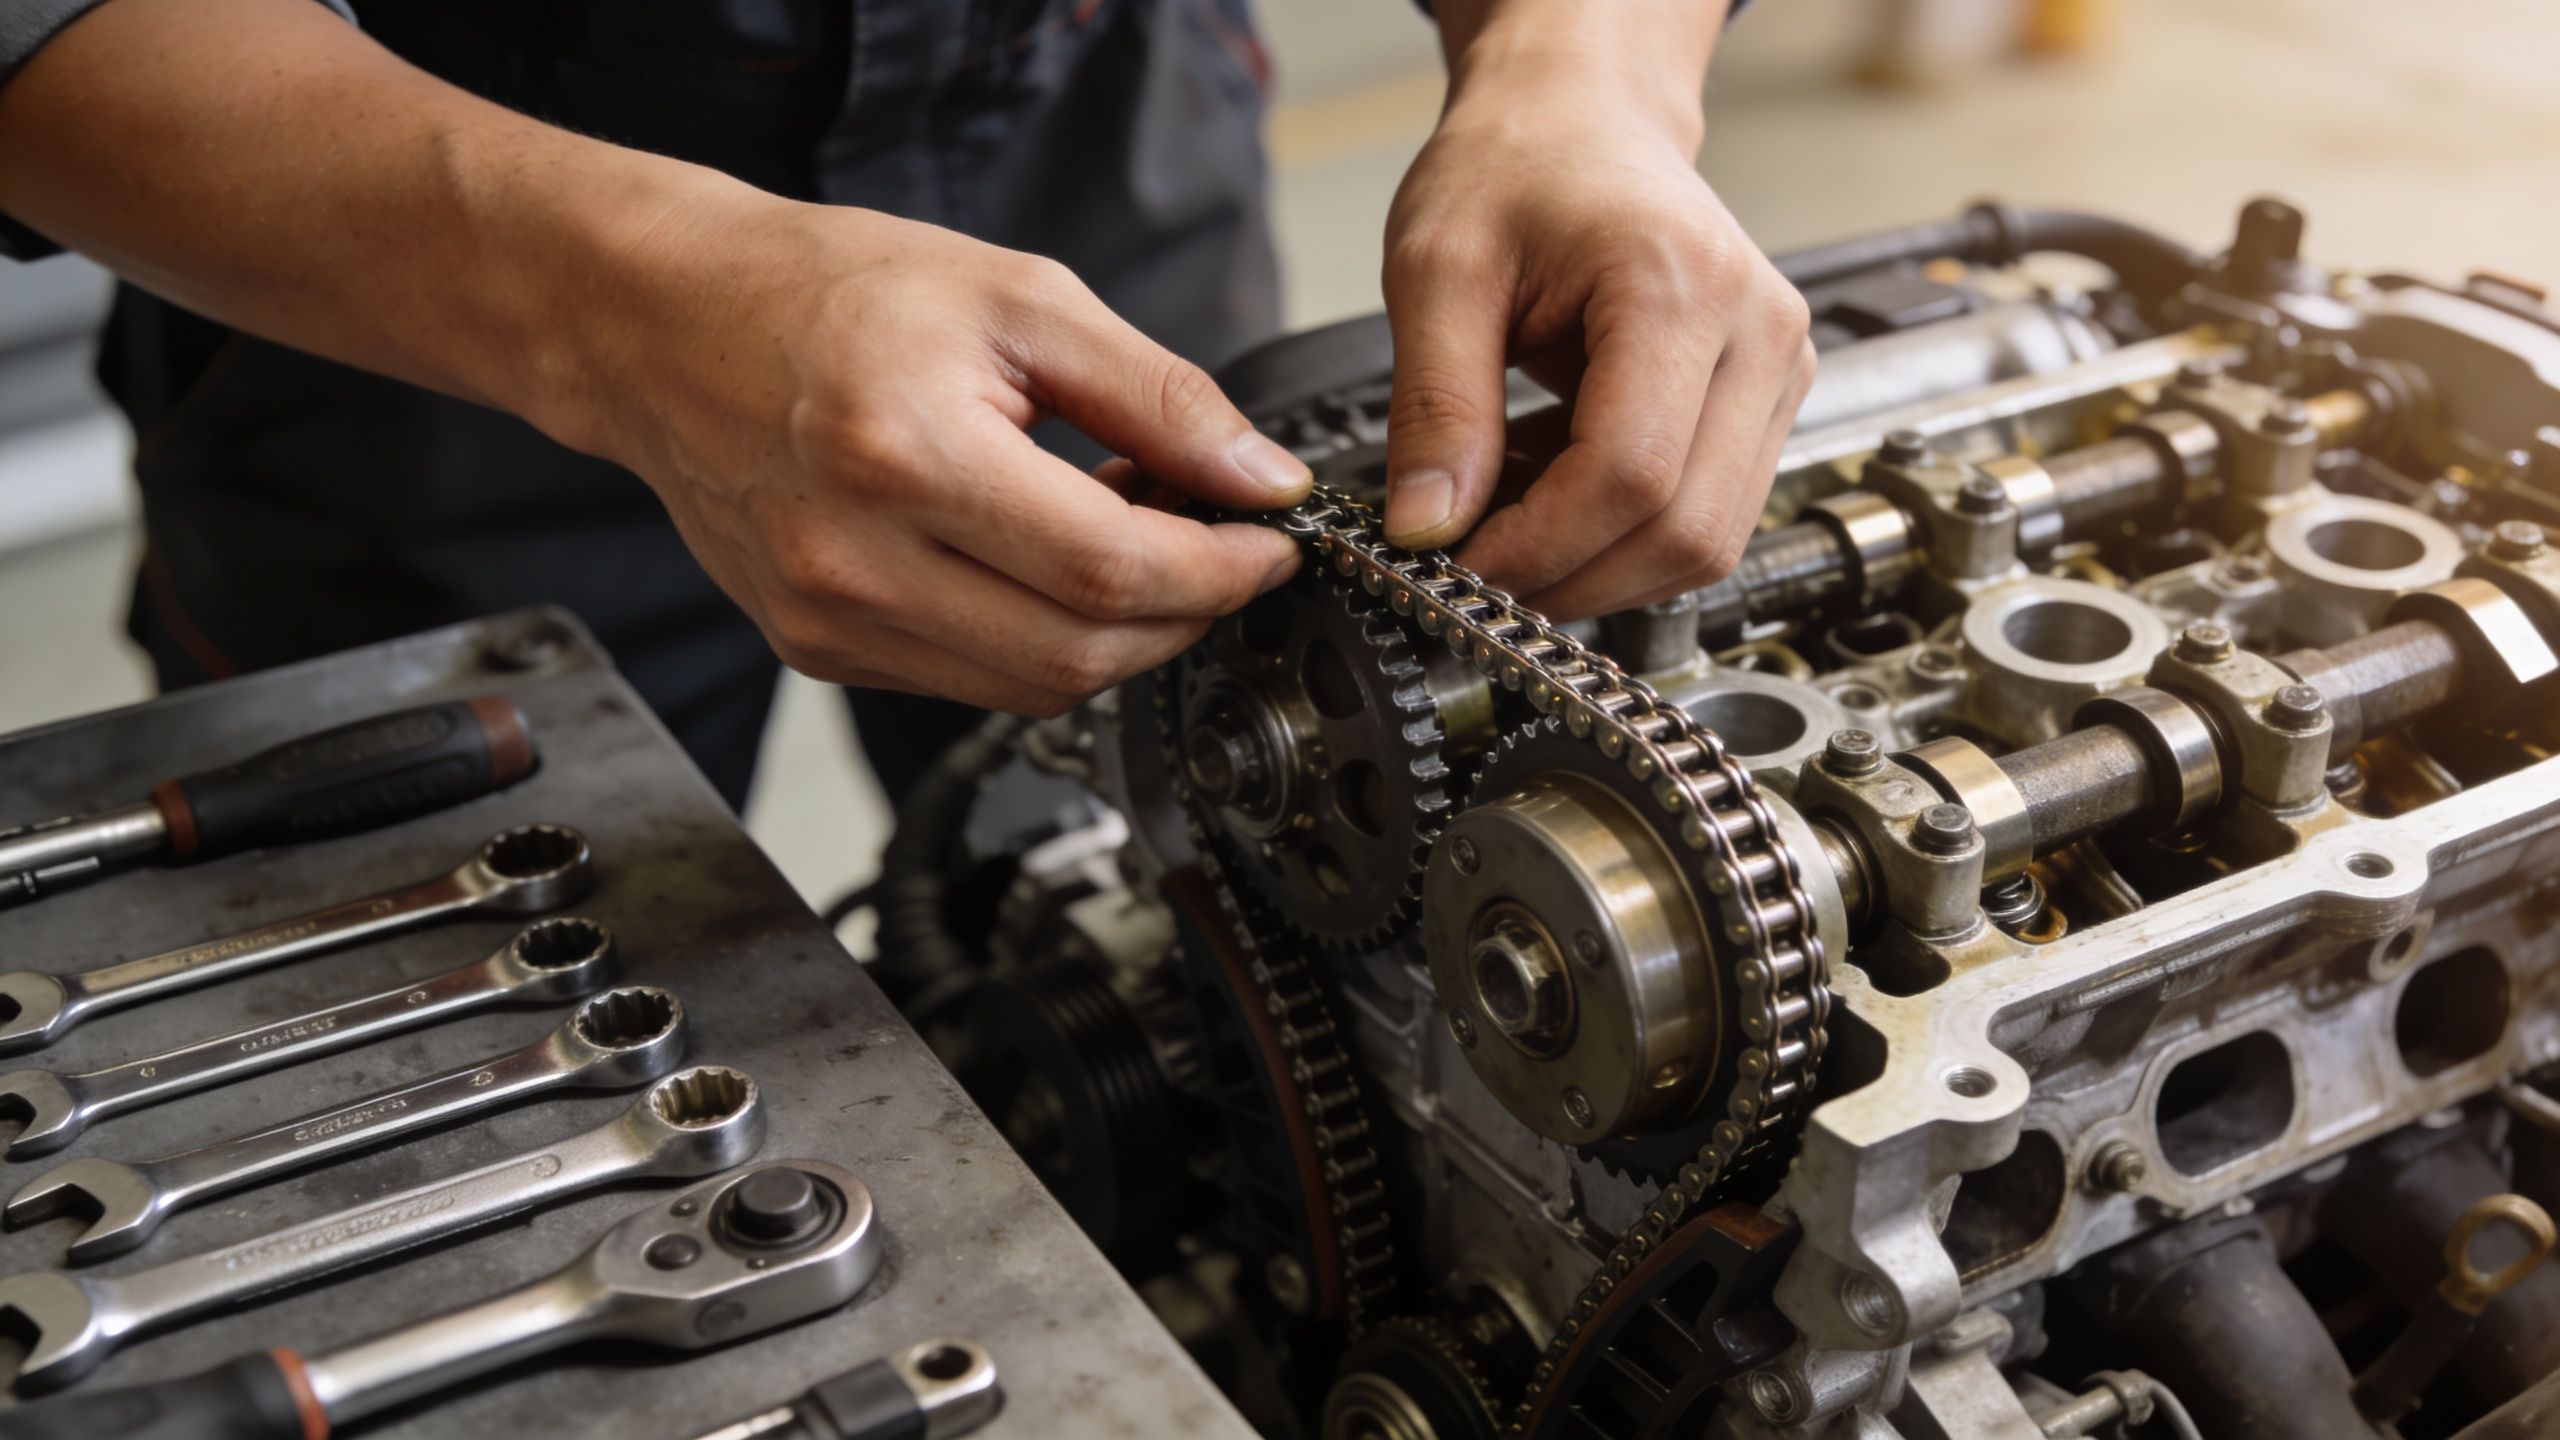
Navigating the Timing Chain Replacement Process
A timing job rewards discipline more than speed. The cleanest jobs come from technicians who slow down, label hardware, and verify alignment before a single new part goes in.
Preparation and access
Most jobs begin with the same broad pattern. Disconnect power. Drain the fluids required by the engine layout. Remove covers, accessory drive components, brackets, and whatever blocks access to the front of the engine.
Organization now starts paying off. Bag bolts by component. Take reference photos. Don’t assume every bolt length is obvious during reassembly, because it won’t be after hours of teardown.
Before the front cover comes off, clean around the work area. Dirt that drops into an exposed engine creates a second problem while you’re trying to solve the first.
Alignment comes before removal
The chain doesn’t come off first. The engine gets positioned first.
Set the engine to the required timing position for that application, usually with the crank and cams at their specified marks or locked with dedicated tools. Then verify the marks. Then verify them again. On many engines, one missed tooth won’t look dramatic by eye, but it can create major trouble once the engine starts.
The dangerous mistake here is confidence without confirmation. A lot of DIY failures happen because the installer trusted paint marks, ignored a service procedure, or rotated something independently after the chain was removed.
Replace the whole wear path
A timing chain system is only as good as the weakest piece in it. That’s why you should always replace the guides with the chain, even if they look usable. Plastic guides get brittle, can crack, and can let the chain slap hard enough to damage VVT actuators. For high-mileage vehicles in hot climates like Texas, blocked oil passages contribute to a 30% higher failure rate for these components, as explained in this plastic timing chain guides article.
That changes the repair strategy. The goal isn’t just to install a new chain. The goal is to restore chain control.
A proper component swap usually means replacing:
- Primary chain
- Guides
- Tensioner
- Any related exposed drive chains or worn sprockets
- Seals and gaskets disturbed during access
Replace what the labor exposes, not just what made the noise.
This is a useful visual reference for the general workflow before reassembly gets technical:
Reassembly is where good jobs stay good
Once the new parts are in place, don’t rush the close-up phase. Chain timing marks need to be checked against the engine’s reference points. Guides and tensioners need proper seating. Gasket surfaces need to be clean and dry where the procedure calls for it, and sealed correctly where the procedure calls for sealant.
A few practical habits matter here:
- Pre-lube moving parts: Dry installation invites startup wear.
- Use the specified torque sequence: Even a simple front cover can leak if tightened unevenly.
- Hand-rotate the engine before startup: If timing is wrong, you want to find out by hand, not with the starter.
- Refill fluids carefully and bleed as required: An engine repair shouldn’t create a cooling system problem.
Final checks before the key turn
When the engine is back together, inspection matters as much as the wrench work.
Use a checklist:
| Check | Why it matters |
|---|---|
| Timing marks verified | Confirms mechanical sync before startup |
| All connectors and grounds attached | Prevents false no-start or sensor issues |
| Oil and coolant refilled | Protects the engine on first start |
| No leftover hardware | Reduces the odds that something critical was missed |
| Covers and seals inspected | Prevents immediate leaks after repair |
If there’s one lesson every successful chain job has in common, it’s this: careful mechanics beat fast mechanics.
Avoiding Common Pitfalls and Model-Specific Issues
The mistakes that ruin timing jobs usually don’t look dramatic at first. A bolt gets reused when it shouldn’t. A gasket surface keeps old sealant. A chain is aligned close enough, not exactly. The engine may even start. Then it rattles, leaks, runs poorly, or comes back on a hook.
The common mistakes that cause comeback repairs
A few errors show up over and over:
- Skipping guide replacement: The old brittle guide becomes the weak link immediately.
- Undertorquing or overtorquing hardware: Guides, sprockets, and tensioners need exact clamping force.
- Failing to prime or preload where required: A tensioner that isn’t ready can leave slack on startup.
- Poor gasket prep: Oil leaks after major engine work are often a cleaning problem, not a parts problem.
- Rotating the engine without rechecking timing marks: That’s how minor doubt becomes major damage.
The front cover going back on is not the end of the job. The first hand rotation is where you find out whether your work was precise.

A GM Ecotec example that catches people
GM Ecotec timing jobs are a good example of why generic instructions fail. The obvious repair path can still miss the actual cause of repeat trouble.
On GM Ecotec 2.0L, 2.2L, and 2.4L engines, worn balance shaft sprockets account for 40% of repeat failures, and a complete repair aims for more than 150,000 miles post-repair when all components are replaced according to this GM Ecotec timing procedure reference. That’s the gotcha. A technician who replaces only the main chain set but ignores the balance shaft chain path can send the vehicle out with the comeback already built in.
Critical specs matter too. That same reference calls for 63 ft-lbs plus 30° on cam sprocket bolts, and 89 in-lbs on tensioner and guide bolts. If those numbers aren’t followed, the repair quality drops from professional work to guesswork.
What experienced techs do differently
The difference usually isn’t magic. It’s method.
A careful technician will:
- Confirm every chain path in the system, not just the loudest one.
- Use holding tools instead of trusting visual alignment.
- Replace exposed wear components while access is available.
- Torque hardware to spec, then verify it.
- Rotate the engine manually and recheck before startup.
That’s the kind of discipline that keeps a timing chain replacement guide from being just theory. On these jobs, details are the repair.
DIY or Pro Service? A Fort Worth Cost and Risk Analysis
A lot of Fort Worth drivers reach this point when the car still runs, but the estimate is large enough to make a weekend DIY job look tempting. I understand that reaction. Timing chain work can save real labor money if you have the right tools, the right information, and the discipline to stop when something does not line up.
What matters is not confidence alone. It is whether you can set engine timing accurately, verify it before startup, and absorb the cost if the first attempt goes wrong. On many engines, a timing mistake can bend valves, damage pistons, or leave you paying for the same teardown twice.
The cost side
Professional timing chain replacement usually ends up in four figures once labor, gaskets, seals, fluids, and related wear parts are included. For timing chain guide replacement alone, owners often see a lower range, roughly $400 to $1,200 depending on engine design and labor access, and that same cost discussion also notes that amateur jobs often fail because of timing alignment mistakes during reassembly, which is the risk that changes the math for many owners (timing chain guide cost breakdown).
Fort Worth pricing can vary a lot between a simple guide repair on an accessible engine and a full timing set job on a cramped transverse layout. That is why itemized estimates matter. Ask whether the quote includes guides, tensioners, sprockets, front cover seals, fresh oil and coolant, and any one-time-use bolts. A cheap number on paper can turn into an expensive surprise once the engine is open.
The risk side
This repair rewards method, not speed.
DIY can make sense if you already own specialty tools, have factory service information, and have done internal engine work before. It also helps if the vehicle can sit for several days without creating a transportation problem.
Professional service usually makes more sense when the vehicle is a daily driver, the engine is interference design, the chain noise is already severe, or you are dealing with a model known for timing-related gotchas. In those cases, the labor bill is often cheaper than the consequences of a mistimed engine or an incomplete parts list.
A simple way to decide is to compare three costs, not one:
- Parts and tool cost for a DIY repair
- Your downtime cost if the vehicle is apart longer than planned
- Your failure cost if the engine has to come back apart, or worse, suffers internal damage
Fleet owners and high-mileage drivers should be especially careful here. If one extra day off the road costs more than the labor savings, the lower quote is not the lower operating cost.
A timing job only saves money when it is done once, timed correctly, and repaired completely.
If you are comparing shops instead of doing the work yourself, use this guide to finding a trustworthy mechanic for major engine repairs to vet warranty terms, parts quality, and whether the shop is quoting the full repair or only the obvious pieces.
If your engine is rattling, running rough, or showing timing-related warning signs, Kwik Kar Oil Change and Auto Care can inspect the issue, explain what the repair involves, and help you decide whether it’s time for chain service before a manageable problem turns into major engine damage.