

Your brakes are, without a doubt, the most important safety system on your vehicle. Putting off maintenance isn’t just a gamble on future repair bills; it’s a direct risk to your safety. Getting a handle on the basics now will empower you to make smarter, safer decisions down the road.
Why Proactive Brake Maintenance Is Non-Negotiable
It helps to think of your brake system as a team. When you hit the pedal, hydraulic fluid activates the caliper, which squeezes the brake pads against the spinning rotor. That friction is what brings you to a stop.
In this system, brake pads are designed to be the sacrificial part. They’re made of a special friction material that’s meant to wear down over time, protecting the much more expensive rotors and calipers from taking the abuse.
Catching Problems Before They Start
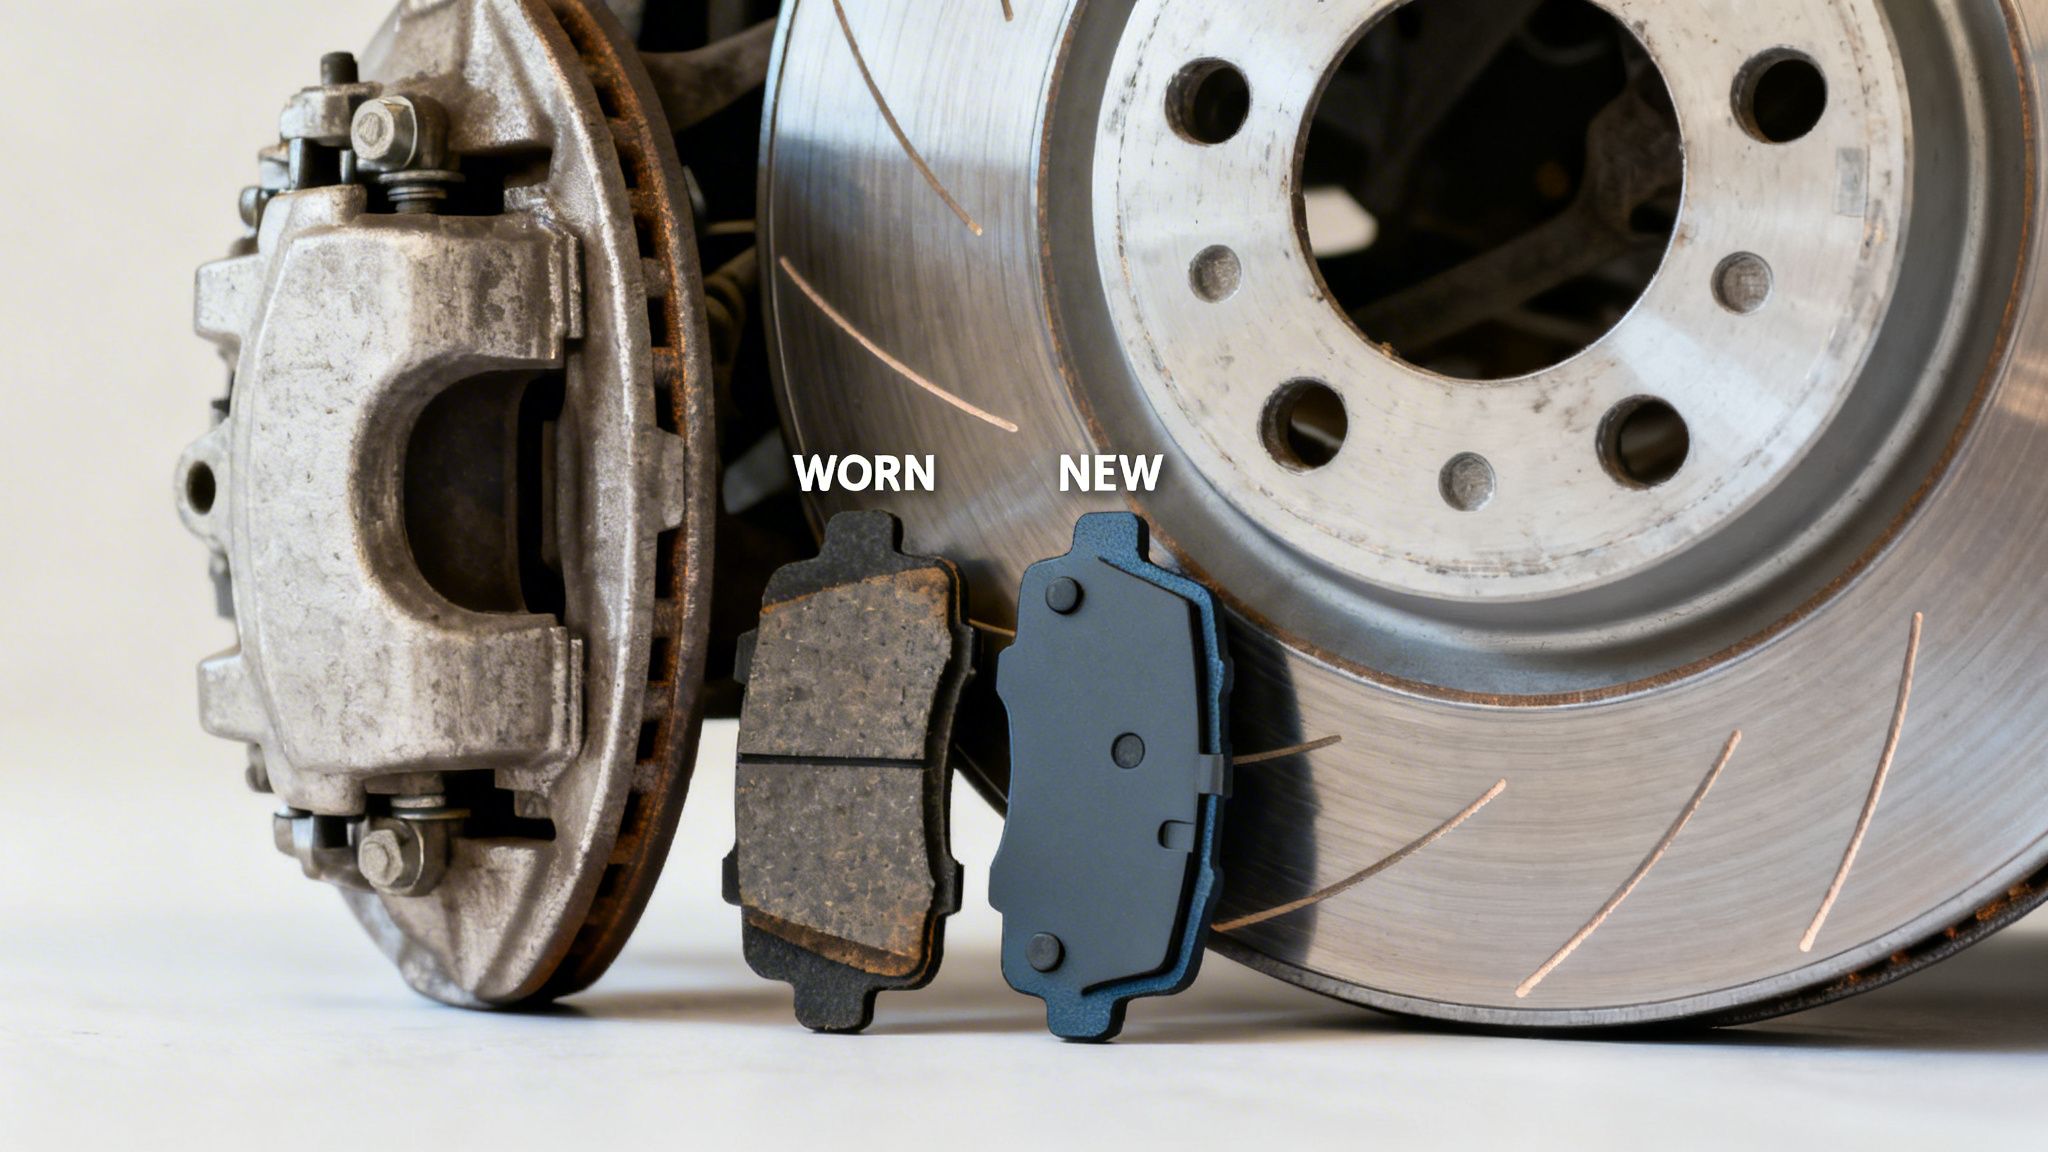
When you let your brakes go, you’re setting yourself up for bigger, more expensive problems. The good news is that the warning signs are unmistakable once you know what to listen and feel for.
- High-Pitched Squealing: This is usually the first red flag. Most brake pads have a small metal tab called a wear indicator. As the pad wears down, this tab scrapes against the rotor and creates that annoying squeal to tell you it’s time for an inspection.
- Grinding Noises: If you hear a deep, guttural grinding sound, stop driving as soon as it’s safe. This means the pad’s friction material is completely gone. You’re now hearing metal on metal—the pad’s backing plate grinding into your rotor and causing serious damage.
- A Shaky or Pulsating Pedal: This often points to warped rotors. When worn pads can’t dissipate heat properly, the rotors can overheat and deform, leading to that shaky feeling when you brake.
Paying attention to these signs is crucial. Routine inspections are a key part of vehicle safety, which is why they are often a major focus of annual brake safety initiatives.
Proactive vs. Reactive: The Financial Difference
Replacing brake pads at the first sign of wear might set you back a few hundred dollars. But if you wait until you hear that grinding, the cost can easily double or triple. At that point, you’re almost guaranteed to be replacing the rotors, too.
The Real-World Benefits of Staying Ahead
Being proactive is about more than just saving money; it’s about having predictable, reliable stopping power when you need it most. Think about navigating stop-and-go traffic on I-35W during rush hour—that’s when you need absolute confidence in your brakes. Proactive care delivers that peace of mind.
This approach is so critical that it supports a massive industry. The global market for automotive brake pads is projected to hit $12.49 billion by 2030, with aftermarket replacements making up over 40% of that. This just shows how many drivers are actively choosing to stay on top of their vehicle’s health.
Ultimately, choosing proactive care is a strategic move. By understanding the core differences between, you’re setting yourself up for success, whether you decide to tackle this job yourself or hand it over to the pros at Kwik Kar Fort Worth.
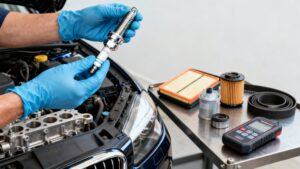
Gathering the Right Tools and Parts for the Job
There’s nothing worse than getting a car up on jack stands, wheels off, only to realize you’re missing the one socket you need. A brake job that should take a couple of hours can quickly turn into an all-day ordeal with multiple trips to the auto parts store. Trust me, I’ve seen it happen countless times.
Getting everything you need collected and laid out before you even touch the lug nuts is the single best thing you can do. This prep work is what separates a smooth, satisfying afternoon project from a frustrating headache.
Essential Tools for Your Brake Job
You don’t need a professional-grade workshop to tackle your own brakes, but having the right tools on hand is non-negotiable. Most of what you’ll need is probably already in your garage, but a few specific items make the job infinitely easier and, more importantly, safer.
Here’s the rundown of what you should have within arm’s reach:
- Safety First: Always start with mechanic’s gloves and a good pair of safety glasses. Brake dust is nasty stuff you don’t want on your skin or in your eyes.
- Get It Lifted: A solid floor jack and a pair of heavy-duty jack stands are an absolute must. Never, ever work on a car that’s only held up by a jack.
- Wheel & Caliper Hardware: You’ll need a lug wrench or a breaker bar for those stubborn lug nuts. A ratchet with a good socket set is your best friend for removing caliper bolts.
- Piston Tool: You have a choice here. A big C-clamp and one of the old brake pads will work in a pinch to press the caliper piston back in. However, a dedicated brake piston spreader gives you much better control and lessens the risk of tearing the piston’s rubber boot.
Here’s a pro tip that gets overlooked all the time: grab a wire brush. You’ll use it to scrub all the rust and gunk off the caliper bracket where the new pad clips sit. A clean surface here is critical for letting the pads move freely and preventing uneven wear.
Finally, do yourself a favor and use a torque wrench to tighten your lug nuts when you’re done. Just guessing at the tightness is the number one way people warp brand-new brake rotors, and you’ll be right back here doing this job all over again.
Selecting the Right Brake Pads and Parts
With your tools ready, it’s time to talk parts. Don’t just walk into the store and buy the cheapest pads on the shelf. The material they’re made from has a massive impact on noise, dust, and how your car feels when you hit the pedal.
Here’s what your shopping list should look like:
- Brake Pads: The star of the show. We’ll get into the different types in a second.
- Brake Hardware: Any decent set of pads comes with new anti-rattle clips. Use them. Tossing the new clips and reusing the old, rusty ones is a recipe for squeaks and rattles.
- Brake Lubricant: You’ll need a small packet of high-temperature, silicone-based grease. This is for the caliper slide pins and the contact points on the back of the pads.
- Brake Cleaner: A can of aerosol brake cleaner is perfect for blasting away all the built-up dust and grime before you put everything back together.
- Brake Pad Wear Sensor: If your car has electronic wear sensors, replace them. They’re a one-time-use part, and the old one will be destroyed when it does its job.
Choosing the right pad material really comes down to how you drive. For most people commuting around Fort Worth, a set of low-dust ceramic pads is a fantastic choice for keeping your wheels clean. But if you’re driving a work truck or towing a boat, the stopping power and heat handling of semi-metallic pads is what you need.
Brake Pad Material Comparison
To help you decide, think about what’s most important to you: quiet operation, stopping power, or budget. This table breaks down the three main options.
| Pad Type | Pros | Cons | Best For |
|---|---|---|---|
| Ceramic | Quiet operation, low dust, long life | Most expensive, less initial bite | Daily drivers and commuters seeking clean wheels |
| Semi-Metallic | Excellent heat dissipation, great stopping power | Can be noisy, produces more brake dust | Performance driving, towing, heavy vehicles |
| Organic | Quiet, inexpensive, gentle on rotors | Wear out quickly, not for aggressive driving | Older vehicles and light-duty, budget-conscious use |
Picking the right pad ensures your new brakes will perform just how you want them to. Once you’ve gathered your tools and made your parts run, you’re ready to get to work.
How to Replace Your Front Brake Pads
Alright, let’s get to the main event. Swapping out your own front brake pads is one of the most rewarding jobs you can do on your car. It’s no surprise they wear out first—your front brakes handle the majority of the stopping power, typically 60-70%, because of how the car’s weight shifts forward when you slow down.
I’m going to walk you through this process just like I would in my own garage. This is more than just a list of steps; it’s a guide packed with real-world tips I’ve picked up over years of working on cars, designed to help you get the job done right.
Before you even think about grabbing a wrench, preparation is everything. Getting your parts and tools together first prevents those frustrating mid-job trips to the auto parts store.
Prepping Your Vehicle for Surgery
First things first, you have to get the car lifted and the wheel off safely. This is the foundation of the whole job, so don’t rush it.
Start by parking on a solid, level surface. A garage floor or a flat driveway is perfect. Make sure to chock the rear wheels to eliminate any chance of the car rolling. While the car is still on the ground, use your lug wrench to “break” the lug nuts loose on the wheel you’re starting with. Don’t remove them completely, just get them loose enough to turn by hand later.
Next, locate the proper jack point at the front of your vehicle. This is a reinforced area on the frame designed to support the car’s weight—your owner’s manual will show you exactly where it is. Position your floor jack and lift the car just high enough to slide a jack stand underneath a solid part of the frame rail or pinch weld. Carefully lower the car until it rests securely on the stand.
CRITICAL SAFETY REMINDER
Never, ever work under a car supported only by a jack. Jacks are for lifting, not holding. Once the vehicle is on the jack stand, give the car a good, firm shove to make sure it’s completely stable before you go any further.
With the car safely in the air, you can finish unscrewing the lug nuts and pull the wheel off. This will give you a clear view of the brake caliper, rotor, and the old pads you’re about to change.
Removing the Caliper and Old Pads
The brake caliper is the clamp that squeezes the brake pads against the rotor. To get the old pads out, we need to get it out of the way. For most cars, this means removing two bolts, which are often called guide pins or slider pins.
You’ll usually find these bolts on the back side of the caliper, sometimes hiding under small plastic or rubber dust caps. Just pop those caps off with a flathead screwdriver. You’ll likely need a metric socket or, on many vehicles, a specific size Allen socket (a 7mm is common) to remove them.
After removing both pins, you should be able to wiggle the main body of the caliper off its mounting bracket. Do not let the caliper dangle by its flexible brake hose. That hose isn’t meant to hold any weight and can be easily damaged. Rest the caliper on top of the rotor or use a cheap caliper hook to hang it from the coil spring.
Now the old brake pads should be easy to access. They might slide right out, or you may need to give them a gentle nudge with a screwdriver. Pay close attention to how any anti-rattle clips or springs are installed before you pull them out.
Prepping the Caliper and Installing New Pads
This is where a good brake job becomes a great one. It’s all about proper cleaning and prep. Use a wire brush to scrub the caliper bracket where the old hardware clips were sitting. You need to remove all the rust, dirt, and built-up grime to ensure the new pads can slide smoothly.
Once it’s clean, install the new anti-rattle clips that came with your brake pads. They should snap securely into the bracket. Next, you need to push the caliper piston back into its bore to make room for the thicker new pads.
You’ve got a couple of options for this:
- The C-Clamp Method: An old standby. Just place one of the old brake pads over the piston face to protect it and slowly tighten a large C-clamp to push the piston in.
- The Piston Spreader Tool: This is a dedicated brake tool that makes the job easier and applies more even pressure, which is great for preventing damage to the piston or its rubber dust boot.
As you compress the piston, keep an eye on the brake fluid reservoir under the hood. The fluid level will rise. If it gets near the “MAX” line, use a turkey baster to siphon a little out so it doesn’t overflow and make a mess.
With the piston fully retracted, apply a very thin layer of high-temperature brake lubricant to the back of the new pads and on the “ears” where they will slide in the new clips. Put the new pads into the bracket. If one of your pads has a metal wear indicator, make sure it’s installed correctly.
Finally, clean the guide pins with brake cleaner, apply a fresh coat of brake lube to them, and reinstall the caliper over the new pads. Tighten the guide pins down, reconnect any sensors, and you’re ready to put the wheel back on. Get the lug nuts hand-tight, lower the car, and then use your torque wrench to tighten them to the manufacturer’s specification. Now just repeat the process on the other side.
Tackling Rear Brake Pads and Electronic Parking Brakes

Once you’ve got the front brakes down, moving to the rear introduces a few new wrinkles, especially on more modern cars. While the basic idea of swapping pads is the same, the rear calipers and parking brake system require a completely different game plan. Getting this part wrong can quickly turn a straightforward job into a frustrating and expensive headache.
Rear brake pads typically have a longer life than the fronts, often lasting 50,000 to 70,000 miles, simply because they do less of the heavy lifting when you stop. But when their time is up, they need just as much careful attention. The biggest curveball you’ll face is almost always the rear caliper piston.
Handling Rear Caliper Pistons
Unlike most front calipers where you can just press the piston straight back, many rear calipers incorporate the parking brake mechanism directly. This means the piston has to be rotated and pushed simultaneously to get it to retract. If you try to force it with a C-clamp like you did on the fronts, you’ll wreck the caliper’s internal workings, and your DIY job just got a lot more expensive.
To do this right, you need a specific tool:
- Disc Brake Caliper Tool Kit: This kit is a lifesaver. It comes with a threaded press and a bunch of adapter plates. You just find the plate that matches the slots on your caliper piston, attach it to the tool, and turn the handle. It smoothly winds the piston right back into its housing.
You can’t really do this job without one. Thankfully, they’re inexpensive to buy, or you can usually rent one from any major auto parts store.
The Challenge of Electronic Parking Brakes
If your vehicle has an Electronic Parking Brake (EPB), things get a little more high-tech. You absolutely cannot manually retract the caliper piston on these systems. Trying to force it will cause serious, costly damage to the caliper’s tiny electric motor.
An EPB uses an electric motor to apply and release the parking brake. Before you can even think about changing the pads, you have to put the system into “Service Mode” or “Maintenance Mode.” This command electronically pulls back the parking brake mechanism, giving you the clearance to then push the piston back.
How you activate this mode depends entirely on your vehicle’s manufacturer. Some cars let you do it with a specific sequence from the driver’s seat—something like pressing the gas pedal while holding the parking brake switch. Others, however, require a specialized OBD-II scan tool with brake service functions to tell the car’s computer what to do.
Before you start, check your owner’s manual or a trustworthy online forum for your specific model to find the correct procedure. Skipping this step is not an option.
Troubleshooting Common Rear Brake Hiccups
Even when you do everything by the book, you can still hit a snag. Here’s what to do if you run into trouble.
- A Stuck Caliper Piston: If that piston just won’t turn back in (even with the right tool), the caliper itself might be seized from internal rust or a busted parking brake mechanism. At this point, it’s wise to stop and consider either replacing the caliper or getting a professional diagnosis.
- EPB Won’t Enter Service Mode: First, triple-check that you’re following the procedure to the letter. If it still refuses to cooperate, you might have a bad switch or another electrical issue that needs a diagnostic scan tool. This is a common point where a DIY job turns into a call to the experts at Kwik Kar.
- Parking Brake Not Working After Job: After you’ve put everything back together, you have to exit service mode by reversing the steps. The system should then recalibrate itself to the new, thicker pads. If it doesn’t seem to work, running through the enter/exit service mode sequence one more time usually does the trick.
The growing complexity in rear brakes, particularly with EPBs, is a reflection of where car technology is heading. While North America is a huge market, European standards often lead the way in innovation—over 40% of their market already uses non-asbestos organic pads for environmental reasons. The global shift to electric vehicles with regenerative braking also means brake pads and service knowledge have to keep evolving. You can find more on these global market trends and see just how much the automotive world is changing.
Post-Installation Checks and Knowing When to Call a Pro
Alright, the wheels are back on and the tools are put away. You’re almost there, but don’t close the garage door just yet. Finishing the installation is one thing, but the final checks are what really separate a good job from a safe, professional-quality one.
These last few steps are absolutely critical. They ensure everything is tight, leak-free, and ready for the road. Don’t skip them—this is your final quality control.
The Immediate Post-Installation Checklist
Before you even think about starting the engine, there are a couple of quick but vital checks to perform. Pop the hood and take a look at your brake fluid reservoir. If you siphoned some out earlier, now’s the time to top it off with the correct DOT fluid, making sure not to go past that “MAX” line.
Next, get in the driver’s seat and, without starting the car, pump the brake pedal a few times. The first push will likely feel soft and go right to the floor. That’s totally normal. You’re just seating the caliper pistons against the fresh, thick pads.
After a few pumps, the pedal should feel high and firm. This is non-negotiable. If it still feels spongy or drops to the floor, STOP. You’ve likely got a leak or air in the lines, and that’s a job for a professional right away.
Once that pedal feels solid, do one last walk-around. Look closely at the calipers and along the brake lines for any hint of fluid drips. Seeing any moisture is a major red flag that needs immediate attention.
The All-Important Bedding-In Process
Here’s a step that a lot of first-timers miss: bedding in your new brakes. This process is all about mating the new pad material to the rotor by transferring an even layer of friction compound. Getting this right is the key to silent, powerful braking and preventing that annoying brake judder down the road.
To do it properly, you’ll need a safe, empty stretch of road where you can make a few stops without being a hazard.
- Get your speed up to about 35-40 mph.
- Apply firm, steady pressure to the brakes to slow down to 10 mph. Do not come to a complete stop.
- Repeat this about 6 to 8 times. You’re trying to build up a good amount of heat in the pads and rotors.
- After the final slowdown, just drive normally for several minutes, using the brakes as little as possible. This lets them cool down completely and sets the material layer.
Following this procedure not only ensures your brakes work their best but also gives you a feel for how they’re performing. It’s also a good time to pay attention to your rotors, which you can learn more about in our guide on how to inspect brake rotors.
When to Wave the White Flag and Call a Pro
There’s a reason we’re also a professional shop—some jobs just need an expert touch. The smartest thing any DIY mechanic can do is recognize their own limits. A standard pad swap is one thing, but certain signs mean it’s time to put the tools down and call the pros at Kwik Kar Fort Worth.
Your safety is never worth the risk of a brake job you’re not 100% confident in. If you run into any of these problems, it’s time to call for backup:
- A Spongy or Soft Pedal: If that pedal just won’t firm up after pumping it, you have a hydraulic issue. This could be air in the lines that needs to be properly bled or a hidden fluid leak.
- A Seized Caliper: You’re using the right tool, but that caliper piston just won’t budge. This means the caliper is seized and has to be replaced—it’s not something you can force.
- Stripped Bolts or Threads: It happens. Overtightening a caliper bolt or bleeder screw can strip the threads, which is a seriously dangerous situation. This requires a professional repair, period.
- Electronic Parking Brake (EPB) Issues: If your car has an EPB and it’s giving you grief—either refusing to go into service mode or not working after the job—stop what you’re doing. These systems require specialized diagnostic tools.
- Any Lingering Doubts: Honestly, if you just have a bad feeling or aren’t sure about a step you completed, there is zero shame in getting a second opinion. We can double-check your work and make sure everything is torqued to spec for total peace of mind.
Common Questions About Brake Pad Replacement
Even the most detailed guide can leave you with a few lingering questions when you’re elbow-deep in a brake job. That’s completely normal. Every car is a little different, and it’s smart to be thorough.
Let’s walk through some of the most common questions we get from drivers, so you can tackle those “what-if” moments with confidence.
How Often Should I Replace My Brake Pads?
There’s no single magic number for brake pad life. You’ll see a huge range, anywhere from 25,000 to 70,000 miles, and it all comes down to your car and how you drive. Stop-and-go city traffic is notoriously hard on pads, while gentle highway cruising lets them last much longer.
The best practice is simply to check them regularly. A great time to do this is during a tire rotation. As a rule of thumb, once the pad material wears down to about 3-4mm, it’s time to start planning for a replacement.
Should I Replace Rotors at the Same Time as Pads?
This is the age-old question, and the honest answer is: it depends. You don’t always have to, but it’s often the smartest move.
You absolutely must replace your rotors if you find any of these issues:
- They’re worn below the minimum thickness (this is usually stamped right on the rotor).
- They feel warped, which causes a pulsing or shaking in your brake pedal.
- They have deep grooves or visible cracks.
Even if your rotors seem okay, putting fresh pads on a fresh set of rotors is the gold standard. It gives the new pads a perfectly smooth surface to mate with, which means better performance and a longer life for your new pads.
A great deal of a pad’s lifespan depends on the condition of the rotor it’s paired with. You can learn more about what to look for by reading our guide on how different brake pads wear.
What Does It Mean to Bed In New Brakes?
This is a step that people often skip, but it makes a world of difference. Bedding in your new brakes is the process of breaking them in properly. It involves transferring a thin, even layer of friction material from the pads onto the rotors.
The process is straightforward: perform a series of moderate stops from around 35-40 mph down to 10 mph. The key is not to come to a complete stop. After a handful of these, just drive for a bit, using the brakes as little as possible to let them cool down. This simple procedure is what ensures quiet, powerful braking right from the start.
Can I Use Any Type of Brake Fluid?
Absolutely not. Using the wrong brake fluid is one of the most critical mistakes you can make. Your car’s braking system is designed for a very specific fluid, usually DOT 3 or DOT 4. You can almost always find this information printed right on the cap of the brake fluid reservoir.
The wrong fluid can destroy the rubber seals and hoses in your brake lines, leading to leaks and a dangerous loss of braking power. Remember, brake fluid also absorbs moisture over time, which lowers its boiling point. That’s why we recommend a full fluid flush every two to three years to keep your brakes working exactly as they should.
If you’ve run into a snag or just decided this job is better left to the pros, don’t hesitate. The certified technicians at Kwik Kar Oil Change and Auto Care are always here to help. We can double-check your work or handle the entire brake service for you, giving you total peace of mind. Schedule your appointment today.