



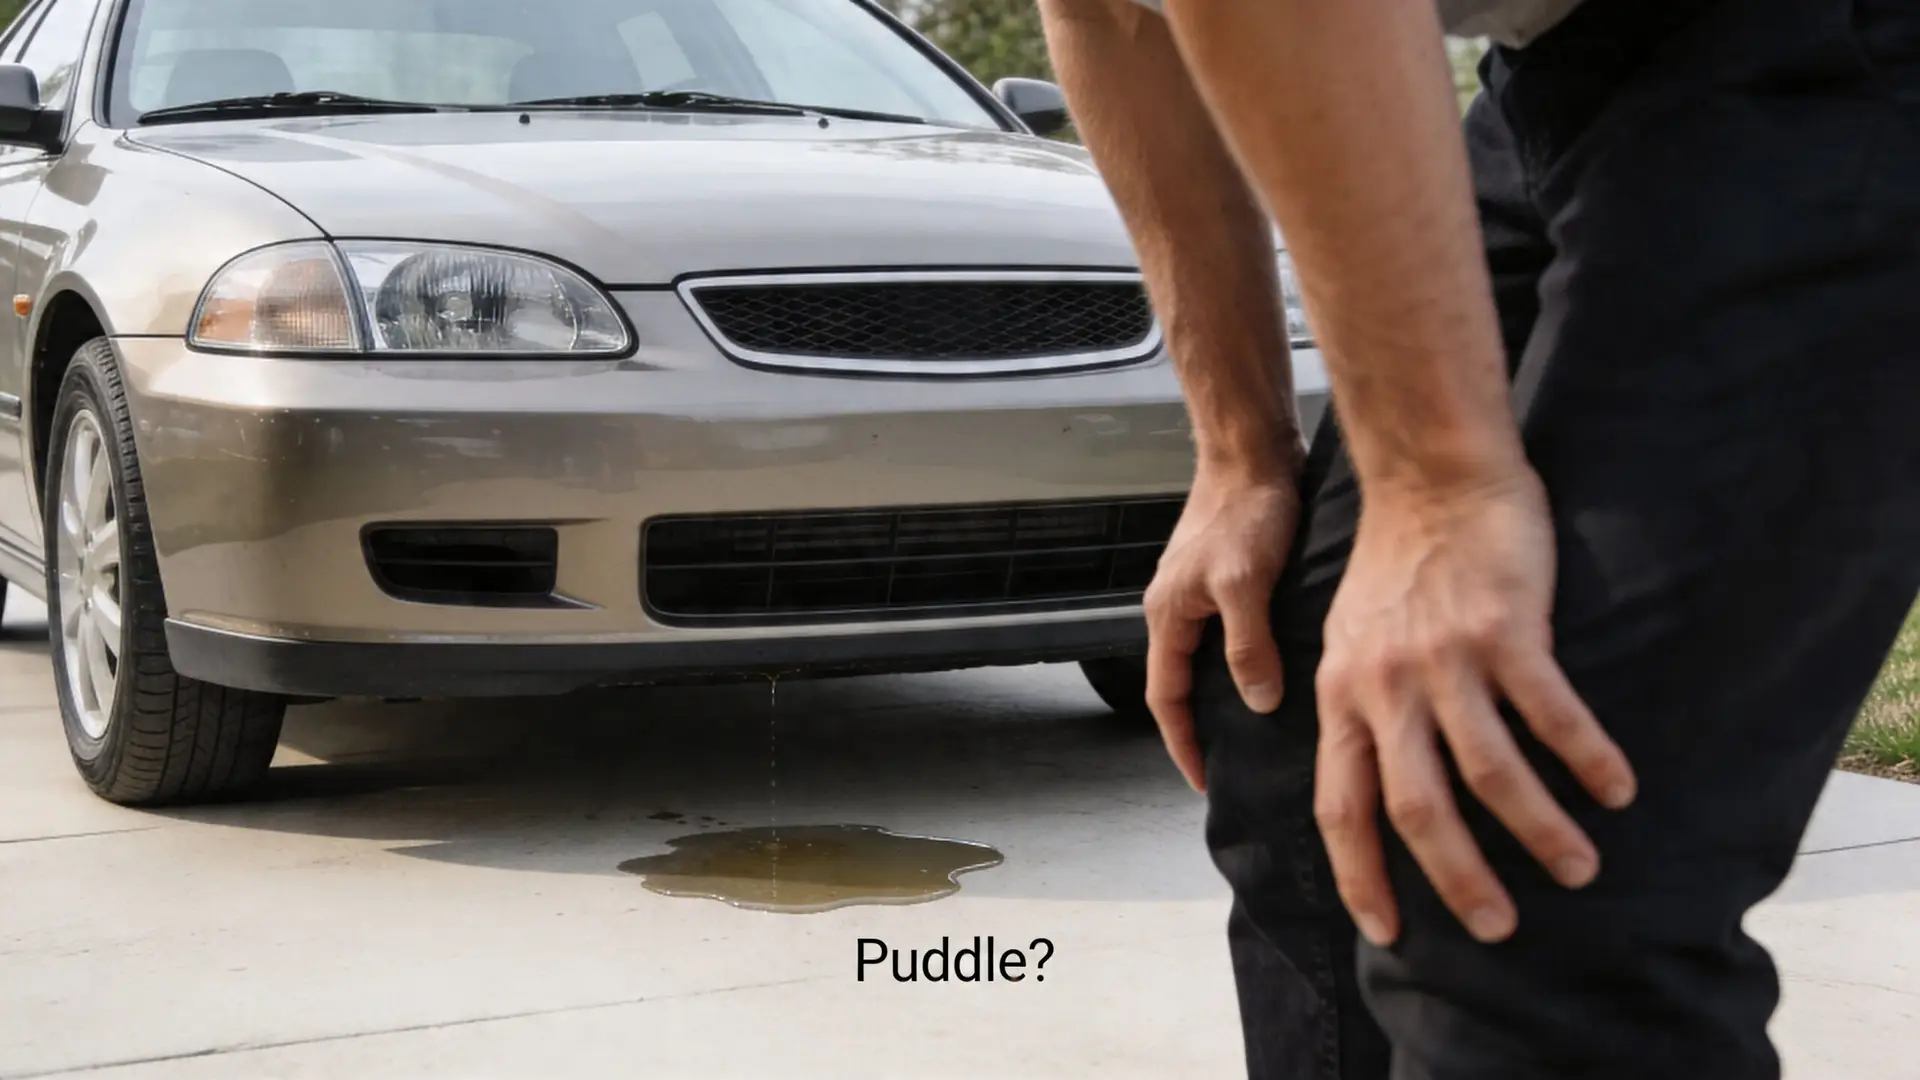
You head out in the morning, coffee in hand, and there it is. A dark spot under the car. Maybe it’s a few drops. Maybe it’s a puddle spreading wider than you want to look at. Most drivers jump straight to the worst-case scenario.
That reaction makes sense, but a fluid leaking from car problem usually becomes easier once you slow it down and identify what you’re seeing. In the shop, that’s how we approach it. Not with panic, and not with guessing. We look at the fluid, where it’s landing, how fast it’s leaking, and whether the car is still safe to drive.
In Fort Worth, a lot of vehicles are high-mileage commuters. That matters, because an older engine or transmission may show some damp seepage without being in immediate danger, while an active puddle under the same vehicle can mean you need to stop driving it today. The difference is what saves you money, time, and sometimes an engine or brake system.
That Dreaded Puddle What a Fluid Leak Means for Your Car
You back out of the driveway, spot a fresh wet mark where the car was parked, and now you need to make a quick call. Is it a normal high-mileage seep, or the kind of leak that can leave you stranded on I-30 this afternoon?
A fluid leak means one thing. A sealed system is no longer sealed. What matters next is how fast the fluid is leaving, what system it belongs to, and what could happen if the level drops.
What the puddle is really telling you
In the shop, I sort leaks into two buckets right away. Seepage leaves a damp film, a dirty oily residue, or the occasional drop between oil changes. An active leak leaves repeated drips, fresh spots after parking, or a puddle you can measure.
That difference matters because the repair decision changes with it.
A valve cover gasket that lightly seeps on a 180,000-mile engine may be something you watch and plan for. Brake fluid near a wheel, coolant pouring out, or a transmission leak that leaves a red puddle is a same-day problem. If you are seeing signs of a transmission leak, this guide on a transmission fluid leak and what it means can help you understand the risk before damage gets expensive.
When a customer brings me a photo of a driveway stain, I usually start with three questions:
- What fluid is leaking
- How much is coming out
- How quickly the spot returns after you clean it up
Those answers tell you whether the smart move is to monitor it, top off a fluid and drive straight to a shop, or stop driving and arrange a tow.
Leaks range from nuisance to danger
Small leaks can stay small for a while. They still cost you over time. Oil on suspension parts swells rubber. Coolant leaks tend to get worse under heat and pressure. Power steering and transmission leaks often start as a minor mess, then turn into low-fluid damage if the level is ignored.
Puddles are different. A real puddle usually means the leak is active enough to change fluid level fast, and that is where DIY guesswork gets expensive.
There is also a practical cleanup issue. Even a minor leak can stain concrete, attract dirt, damage driveway surfaces, and wash into storm drains. Used motor oil spreads quickly on water, so fixing a leak early is not just about the car.
The goal is not to panic. It is to triage the problem correctly. Catch seepage early, budget repairs before they grow, and treat any fresh puddle like a warning that deserves a closer look right away.
The Fluid Color Code Identifying Leaks by Sight and Smell
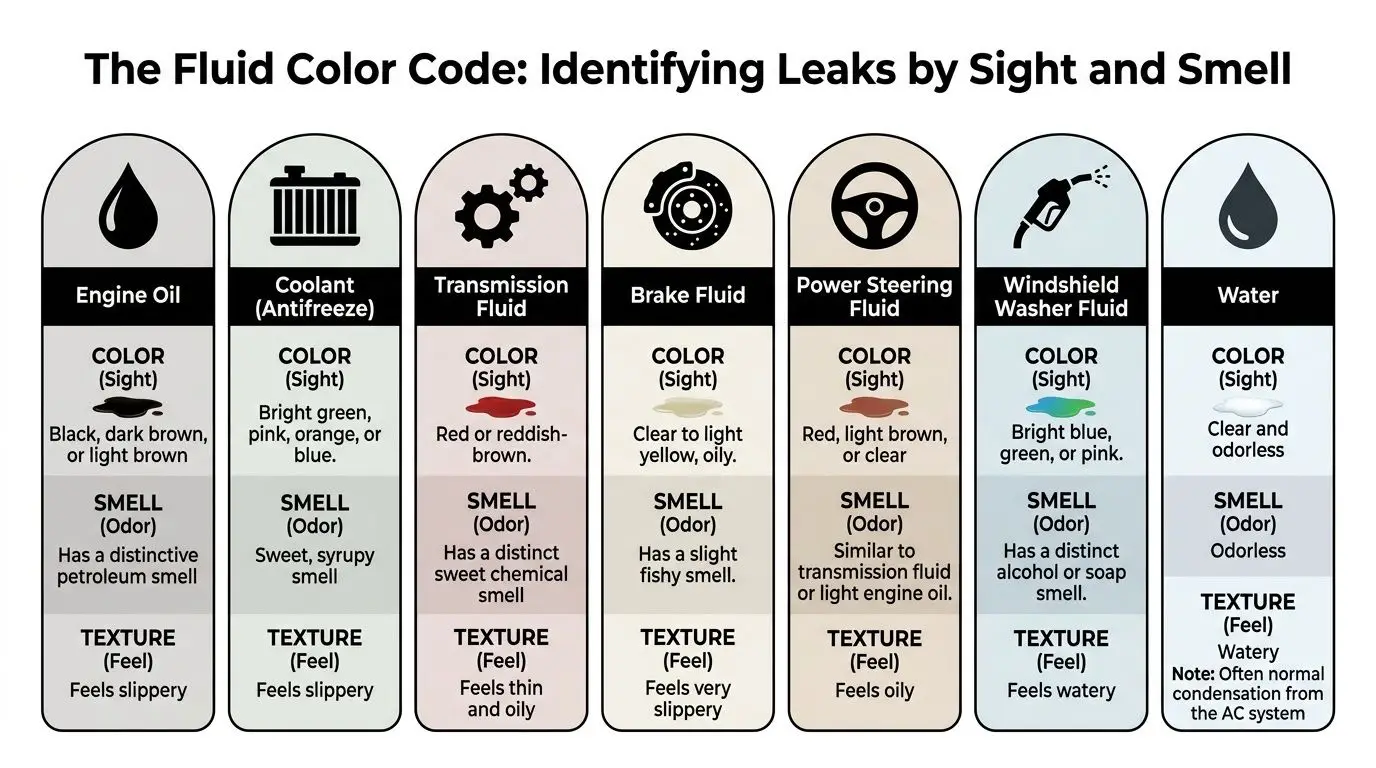
If you want a useful answer before calling a shop, start with cardboard. Park on a clean surface overnight and slide clean white cardboard or paper under the area where you think the leak is coming from. The next morning, look at the color, feel, and position of the drips.
That simple test is one of the fastest ways to narrow down a fluid leaking from car problem.
Quick identification chart
| Fluid Type | Color | Consistency & Feel | Common Location |
|---|---|---|---|
| Engine oil | Dark brown or black | Viscous, slippery | Under engine area |
| Transmission fluid | Red or brown | Thick, oily | Middle-front area, transmission pan area |
| Coolant | Green, pink, or yellow | Slippery, sweet-smelling | Front of vehicle, radiator and hose area |
| Brake fluid | Clear to yellow | Slippery | Near wheels or brake components |
| Washer fluid | Often blue, green, or pink | Watery | Front of vehicle |
| Water | Clear | Thin, odorless | Usually under passenger-side front area after A/C use |
Engine oil
Engine oil usually shows up as dark brown or black viscous fluid. It feels slick, sticks to your fingers, and tends to collect under the engine area. Common leak points include the oil pan gasket, valve cover gasket, and crankshaft seals.
A very light oil film on an old engine can be seepage. Fresh drops on the driveway are different. Those need attention sooner.
Transmission fluid
Transmission fluid is often red or brown and thicker than coolant. It usually lands closer to the transmission area, which may be under the middle-front section depending on the vehicle.
If you suspect this one, don’t put it off. Transmission leaks can stay small for a while, then become expensive quickly. If you want a more specific look at that issue, this guide on transmission fluid leak symptoms and repair is useful.
Coolant
Coolant tends to be green, pink, or yellow, and it often has a sweet smell. It feels slippery but not oily like engine oil.
This leak often shows up near the radiator, upper or lower hoses, water pump area, or around the coolant reservoir. A small coolant leak can become a big overheating problem if you keep driving and topping it off without fixing the source.
Brake fluid
Brake fluid is one of the most important leaks to identify correctly. It’s usually clear to yellow and very slippery. If you see it near a wheel, brake line area, or under the driver’s side area, take it seriously.
Brake fluid leaks aren’t monitor-and-wait issues. They’re safety issues.
What shops use to confirm the source
At home, color and location get you close. In a shop, we go further with visual tracing and UV dye. According to Bar’s Leaks fluid leak identification guidance, the cardboard method combined with UV dye allows ASE-certified shops to pinpoint 85-95% of leaks on the first attempt.
If the fluid’s color is hard to read on dirty pavement, cardboard usually tells the truth fast.
Performing Your Own Leak Investigation at Home
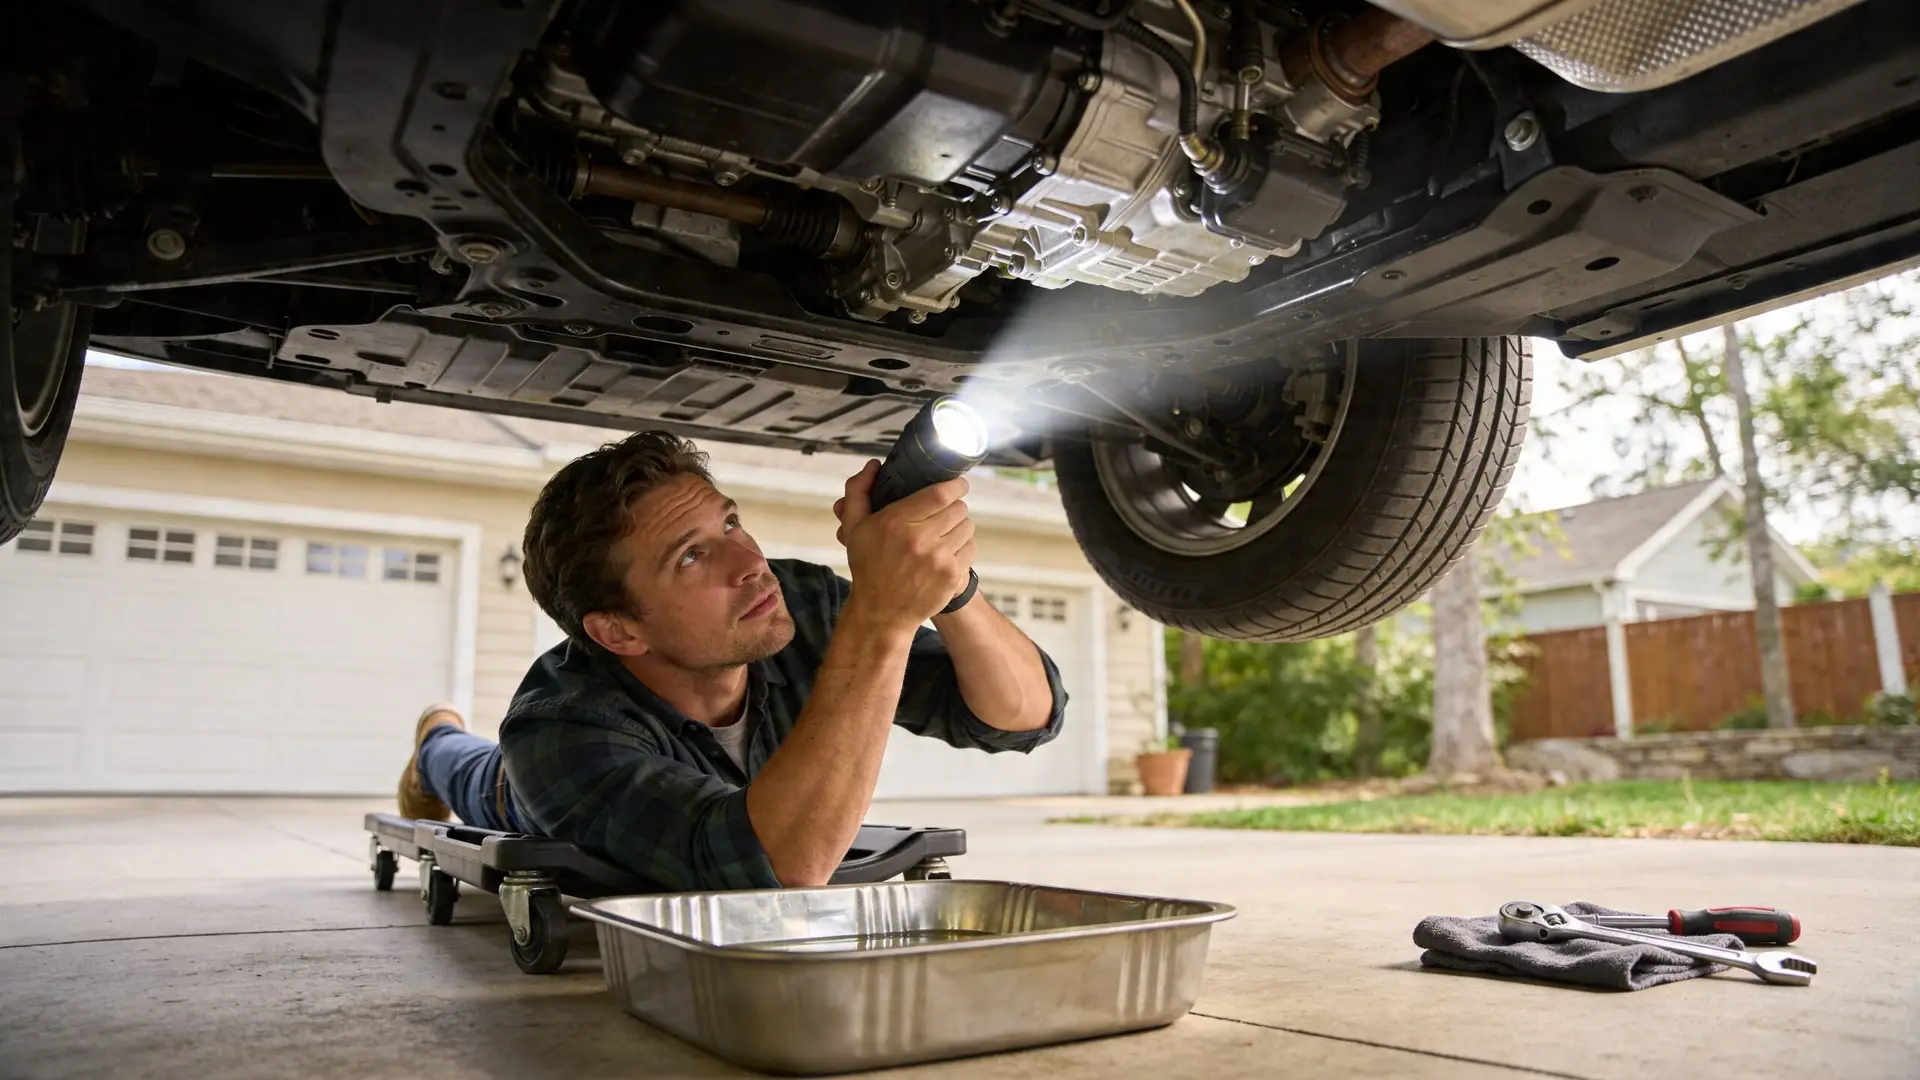
You don’t need a full lift or a scan tool to do a first check. You just need a cool engine, decent light, and enough patience not to rush.
Start with what you can safely verify without crawling into danger or opening hot systems.
Start with the ground, then the levels
Once you’ve done the cardboard test, check the fluid levels that match what you found.
- Check engine oil first. Pull the dipstick, wipe it clean, reinsert it, then read the level. If it’s low and you found dark oily drips, the leak is likely active enough to matter.
- Check coolant only when the engine is cool. Look at the reservoir level. If it’s down and you found sweet-smelling colored fluid, that lines up with a coolant leak.
- Look at the brake fluid reservoir. If it seems low and you also have slick fluid near a wheel, don’t keep driving until it’s inspected.
- Check washer fluid if the leak looks watery and brightly colored. That’s more annoying than dangerous, but it still helps to confirm it.
For a coolant-specific walkthrough, this page on how to check for coolant leaks is worth keeping handy.
Look under the hood without tearing into anything
Open the hood with the engine off and cool. You’re looking for obvious wet areas, not trying to dismantle anything.
Check these spots:
- Around hose connections for wetness, crusty residue, or spray patterns
- Valve cover edges for oily buildup
- Reservoir caps and necks for signs of overflow or seepage
- Brake master cylinder area for dampness
- Under the radiator area for drips or staining
Don’t remove a radiator cap on a hot engine. Don’t slide under a car supported only by a jack. A safe inspection beats a brave one every time.
Here’s a visual walkthrough that helps many drivers understand what they’re looking for:
What your home check can and can’t do
A driveway inspection can tell you a lot. It can often help you identify the fluid type and whether the leak is slow or active.
It can’t always tell you the exact failed part. A wet lower engine area, for example, might be a valve cover gasket leak running downward, not the oil pan itself. That’s where proper tracing, cleaning, and leak detection tools matter.
Understanding Leak Severity From Minor Seeps to Major Drips
You pull out of the driveway in Fort Worth, come back that evening, and see the same dark spot in the same place. The next question is the one that matters. Are you looking at normal age-related seepage, or a leak that is actively costing fluid and setting up a bigger repair?
That distinction saves people money.
What seepage looks like
A seep usually leaves a damp film or greasy buildup around a gasket, seal, or hose connection. Dirt sticks to it. The area looks stained. You may catch a light burnt-oil smell after a drive, especially on older engines, but you do not usually get fresh drops every time you park.
It’s common for cars with higher mileage to show minor seepage as rubber seals harden and gasket material ages. In the shop, a simple rule of thumb is this: if the area stays lightly damp, the fluid level stays steady between checks, and the car is not leaving spots on the ground, you may be able to monitor it instead of rushing into repair.
That does not mean ignore it forever. It means track it.
What active puddling looks like
An active leak behaves differently. You see new drops on cardboard, a repeat wet spot under the same area, or a puddle that grows after each trip. Clean the area, drive the car, and it comes back wet quickly. That points to ongoing fluid loss, not old residue.
At that stage, the cost-benefit changes. Waiting can turn a gasket job into a low-fluid problem, belt contamination, overheated engine, or transmission damage. Brake fluid is the one I do not put in the “watch it for a while” category. If you are not sure why, this quick guide on what brake fluid does in your car explains the risk clearly.
A practical triage method
Use the size, frequency, and fluid level together.
- Monitor it if you see light dampness only, no fresh drips, and the level on the dipstick or reservoir is not dropping.
- Book service soon if you get occasional drops, light spotting where you park, or you have to top off fluid between normal service intervals.
- Treat it as urgent if there is a real puddle, fluid loss over a short time, warning lights, smoke, hot smells, slipping, hard shifting, or any brake-related symptom.
One more shop-tested point. A quarter-sized spot once a week is a very different problem from a hand-sized puddle overnight.
Why owners get this wrong
Fort Worth drivers often swing to one extreme or the other. Some approve repairs on every oily stain they see under a high-mileage car. Others keep adding fluid to a leak that has already moved past the cheap stage.
The better approach is to watch the pattern over a few days. Check where it lands, how much shows up, and whether the level changes. That gives you a better DIY decision. Monitor, top off carefully for a short time, or stop spending guesswork money and get it traced properly.
The same mindset applies in other vehicle emergencies. If you ever put the wrong fuel in the tank, these immediate safety steps for wrong fuel show how fast a small mistake can become an expensive repair if you keep driving.
Critical Safety Actions and When to Stop Driving Immediately
Some leaks are inconvenient. Some leaks take the car off the road the moment you confirm them.
The fastest way to avoid a bad decision is to separate safety-critical leaks from everything else.
Stop driving for these
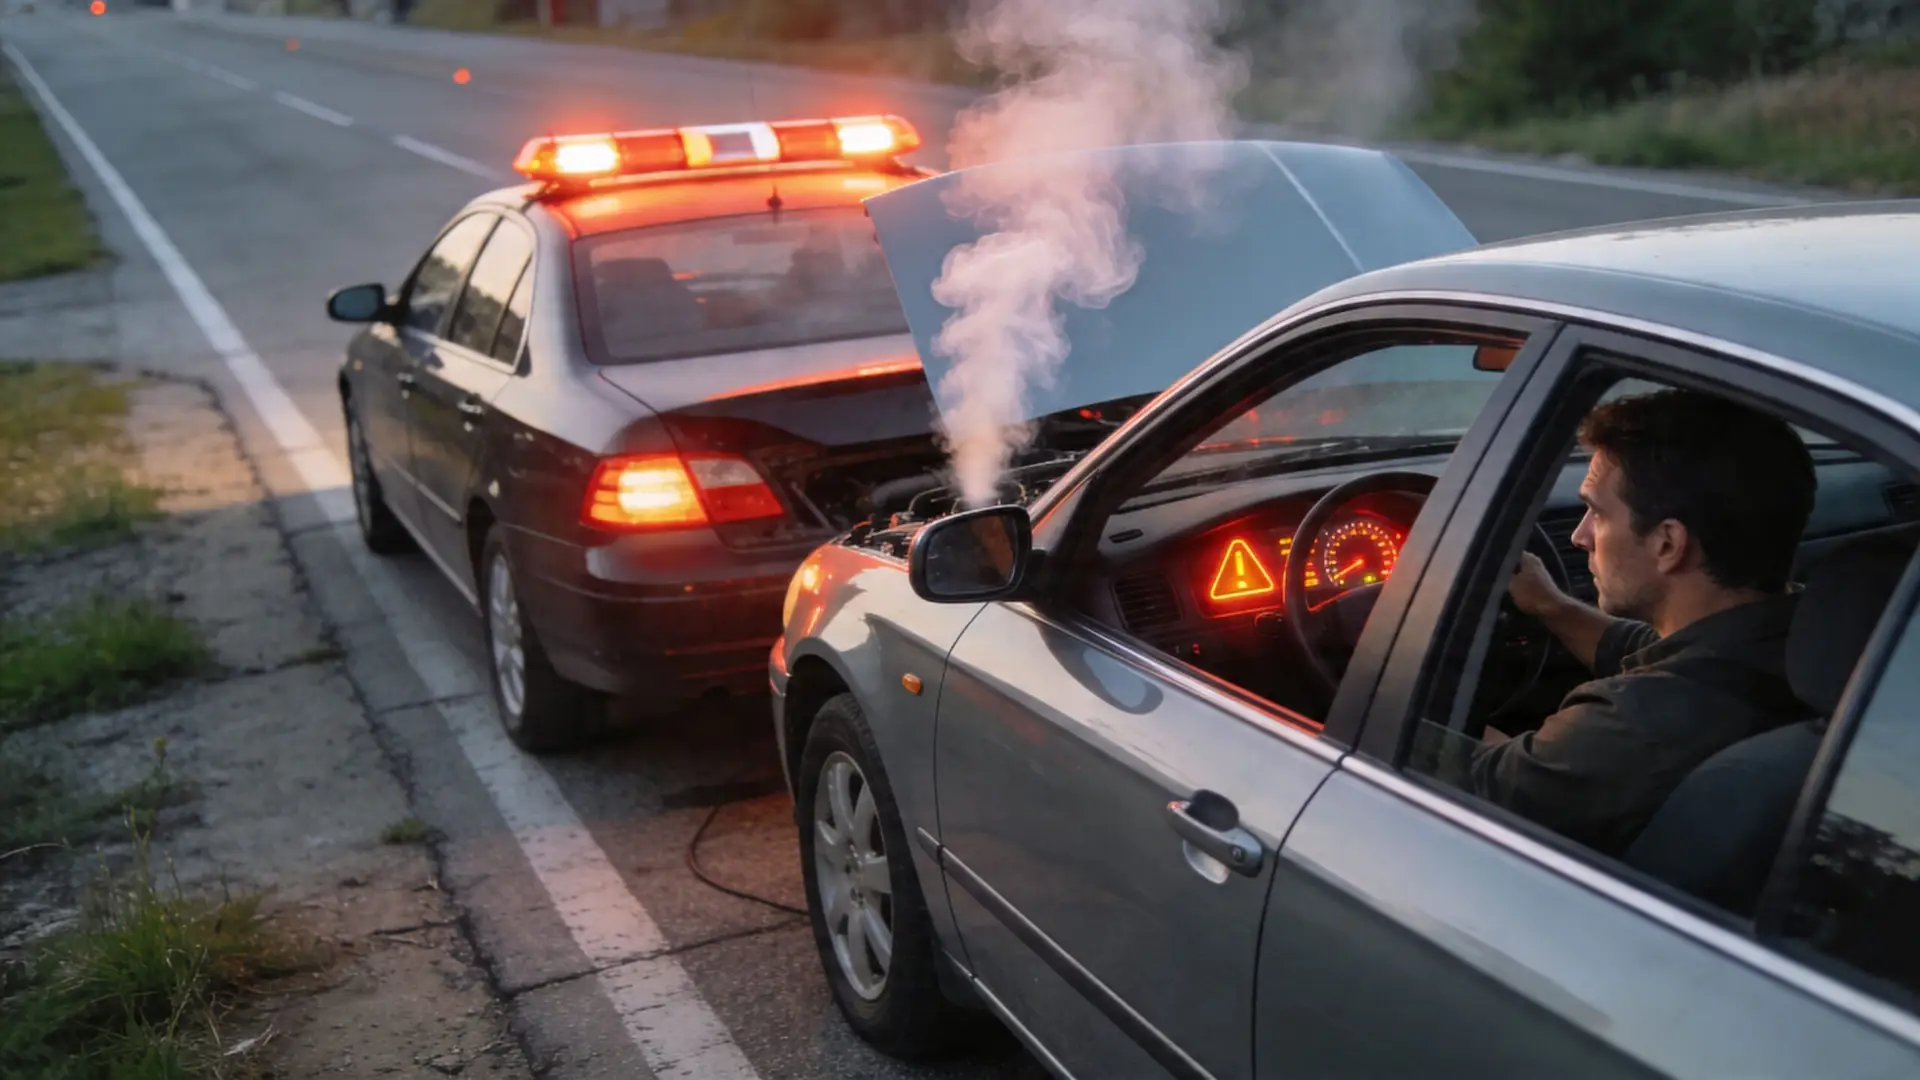
Don’t keep driving if you have any of the following:
- Brake fluid leaking near a wheel or under the brake system area. If the pedal feels soft, drops lower than normal, or the reservoir is down, tow it.
- A major coolant leak with rising temperature. If the temp gauge climbs or steam starts showing, shut it down.
- A large active oil leak. If oil is dropping fast enough to threaten pressure or you smell burning oil heavily, stop and reassess before damage spreads.
If you want a clearer understanding of why this system matters so much, this short explanation of what brake fluid does and why it matters helps connect the leak to the safety risk.
Leaks that may allow a short trip
Some leaks may let you drive a short distance to a repair shop if the level is safe and the car is behaving normally. A minor oil leak or washer fluid leak may fall into that category.
But “it still moves” isn’t the same as “it’s safe.” Watch the gauges, avoid long trips, and don’t gamble on a fluid that affects braking or engine temperature.
Temporary additives have limits
Stop-leak products can sometimes help with small seepage in the right system. They are not a cure for every leak, and they won’t repair a torn hose, cracked housing, or damaged hard part.
Use them as a short-term measure only when the leak type and product are appropriate. Don’t use a bottle to postpone a repair that’s already become active and obvious.
Treat fuel mistakes and fluid emergencies the same way
Drivers often make the same mistake with leaks that they make with misfuelling. They hope the problem will sort itself out if they drive carefully. It usually doesn’t. This guide on immediate safety steps for wrong fuel is a good example of the right mindset. Stop, identify the issue, and avoid turning a manageable problem into a major one.
Navigating Repairs DIY Fixes Pro Costs and When to Call Kwik Kar
A leak repair can be cheap, or it can turn into a major bill fast. The difference usually comes down to two things. How accurately the source is identified, and how long the vehicle is driven after the leak becomes active.
For Fort Worth drivers, I usually frame it this way. A light seep on an older, high-mileage engine may be something you monitor between services. A fresh puddle that keeps coming back is a repair decision, not a wait-and-see situation.
DIY jobs that may make sense
Some repairs are reasonable at home if the source is obvious and access is easy. Tightening a loose drain plug to the correct spec, replacing a cracked washer hose, swapping a simple hose clamp, or correcting an overfilled reservoir can all fall into that category.
DIY stops making financial sense when the job depends on precise refill levels, clean sealing surfaces, pressure testing, or safe lift access. That is where a low-cost home repair often turns into wasted parts, contaminated fluid, or a second repair bill at the shop.
Transmission leaks are a good example. A pan gasket may sound simple, but fluid type, bolt torque, mating surface condition, and final fill procedure all matter. CarParts fluid leak repair guidance notes that transmission leaks become more common as vehicles age and explains how repair costs rise sharply if a small leak is ignored long enough to damage the unit.
Why diagnosis saves money
The wet spot you see is not always the failed part.
Oil runs down crossmembers. Coolant travels along hoses and drips from the lowest edge. Airflow can push fluid backward while you drive, which makes the actual source look higher, lower, or farther back than it is. I have seen customers replace a hose, a cap, and a gasket, then find out the leak started from one cracked plastic fitting.
A proper inspection usually costs less than guessing wrong twice.
What a shop should do before quoting the repair
A good shop should verify the source before recommending parts. That usually includes cleaning the area, checking fluid level and condition, tracing the highest wet point, and testing the system that holds the fluid.
Depending on the leak, that process may involve:
- UV dye for oil, coolant, or transmission fluid
- Cooling system pressure testing
- Lift inspection to trace the leak path correctly
- Brake system inspection for seepage at lines, hoses, calipers, or wheel cylinders
- Seal and gasket inspection to separate normal residue from active leakage
That approach matters because seepage and failure are not the same thing. A damp valve cover on a 180,000-mile engine may be worth watching. Coolant dripping from a water pump weep hole usually is not.
When professional repair is the smart move
Hand the job off if the leak involves brake fluid, fuel, coolant under pressure, transmission fluid, or anything that requires work underneath the vehicle without proper support equipment.
Professional repair also makes sense when the leak source is hidden, the system needs bleeding, or the refill procedure has to be exact. Modern transmissions, cooling systems, and brake systems leave less room for error than older cars did.
At Kwik Kar Oil Change and Auto Care, ASE-certified technicians inspect leaks during diagnostic work and routine service every day. The goal is simple. Confirm the source, separate minor seepage from an active problem, and give you a repair recommendation that matches the actual risk.
The cost-benefit view most owners need
Leak repair is part of general car maintenance, but every leak does not deserve the same response. The practical approach is to spend according to severity.
- Monitor light seepage if fluid levels stay stable and the area is only damp between visits
- Schedule repair soon if you find recurring drops on the driveway or need to top off fluid
- Approve diagnosis first if the source is unclear
- Skip DIY on safety systems unless you have the tools, experience, and correct service information
That is the middle ground that saves money. It keeps you from paying shop labor for harmless residue, and it helps you avoid the much bigger bill that comes from driving on an active leak until a major component fails.
Your Next Step for a Leak-Free Vehicle in Fort Worth
If you’ve found fluid under your car, don’t ignore it and don’t assume the worst. The smart move is to identify the fluid, judge whether it’s seepage or an active leak, and decide whether the car is safe to drive.
That triage process keeps you from wasting money on minor dampness that can be monitored. It also keeps you from making the much more expensive mistake of driving on a brake, coolant, transmission, or major oil leak.
For most Fort Worth drivers, the toughest part isn’t noticing the leak. It’s knowing whether the spot on the driveway is a small maintenance issue or a warning sign that needs immediate attention. That’s where a proper inspection helps. Once the source is confirmed, the repair plan gets a lot clearer.
If you’re dealing with a fluid leaking from car concern right now, get it checked before the leak grows, the fluid level drops further, or the problem spreads into another system. A good diagnosis takes the guesswork out of it, and that’s what saves money in the long run.
If you’re in Fort Worth and want a clear answer on what’s leaking, schedule an inspection with Kwik Kar Oil Change and Auto Care. A proper diagnosis can tell you whether you’re looking at normal high-mileage seepage, an active repair issue, or a safety problem that shouldn’t wait.