Changing your oil is one of those classic DIY car tasks. It's a great way to save a bit of money and get to know your vehicle better, and honestly, the whole thing usually takes less than an hour. If you've ever wanted to get your hands dirty with your car's most important maintenance job, this is the perfect place to start.
Why a Timely Oil Change Is So Important
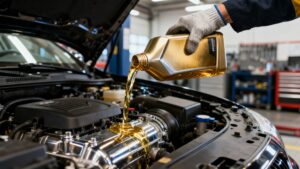
It’s no exaggeration to say motor oil is the lifeblood of your engine. Its job is to lubricate all those fast-moving parts, pull heat away from critical components, and clean out all the gunk that builds up over time. But heat and pressure eventually cause the oil to break down, making it less effective at protecting your engine. At the same time, the oil filter gets clogged with sludge and debris it has worked so hard to trap.
When you change oil and filter together, you’re doing more than just routine maintenance—you’re actively preventing the kind of wear and tear that leads to expensive, catastrophic engine failure down the road. Fresh oil and a new filter ensure everything runs as smoothly and efficiently as the day it left the factory.
Debunking the 3,000-Mile Myth
We’ve all heard it: change your oil every 3,000 miles. For years, that was the gold standard, but for most cars on the road today, it's simply not true anymore. Modern synthetic oils and more advanced engine designs mean many vehicles can easily go 5,000, 7,500, or even up to 15,000 miles between services.
Sticking to an outdated 3,000-mile schedule can lead to wasting perfectly good oil, which isn't great for your wallet or the environment. In fact, outdated advice contributes to millions of gallons of oil being used unnecessarily each year, a topic covered by environmental research on CalRecycle.
The takeaway is simple: Always trust your vehicle’s owner’s manual. It contains the most accurate service interval for your specific engine and driving habits.
Oil Type and Interval General Guidelines
To give you a better idea, here's a quick rundown of common oil types and their typical change intervals. This table provides a general overview, but remember to confirm with your owner's manual.
| Oil Type | Typical Change Interval (Miles) | Best For |
|---|---|---|
| Conventional Oil | 3,000 – 5,000 | Older vehicles, low-mileage drivers, and basic engine designs |
| Synthetic Blend Oil | 5,000 – 7,500 | A good balance of performance and price for everyday driving |
| Full Synthetic Oil | 7,500 – 15,000+ | High-performance engines, extreme temperatures, and new cars |
| High-Mileage Oil | 5,000 – 7,500 | Vehicles with over 75,000 miles; contains seal conditioners |
These are just general guidelines. The best choice always comes down to what the manufacturer recommends for your car.
Choosing the Right Oil and Filter
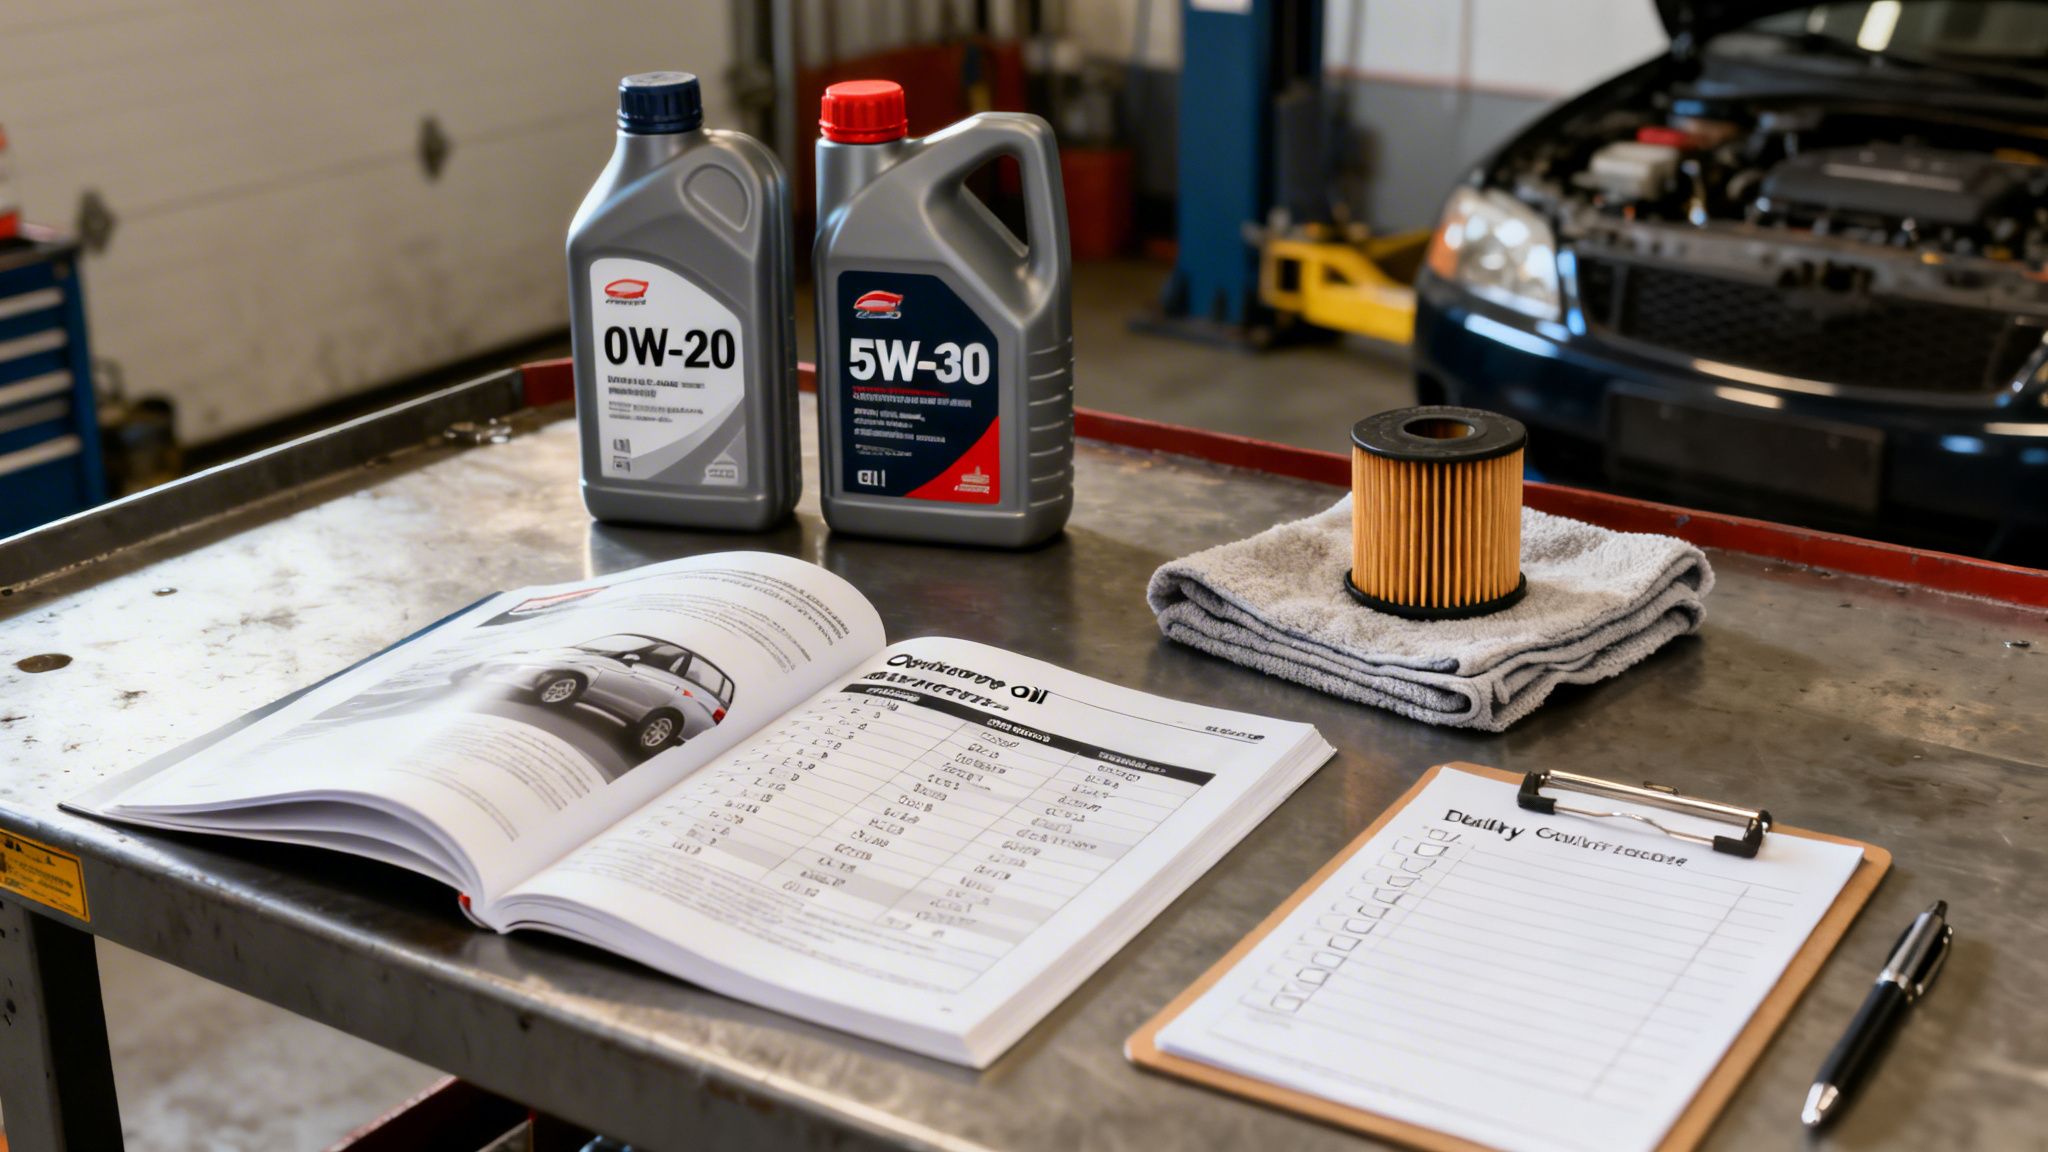
Before you even grab a wrench, you need to have the right supplies on hand. Your owner's manual is your number one resource here, as it will tell you exactly what kind of oil your engine needs.
You'll need to look for two critical pieces of information:
- Viscosity: This refers to the oil's thickness, shown as a code like 5W-30 or 0W-20. Using the wrong viscosity can seriously impact your engine's performance and even reduce fuel economy.
- Specification: Today's engines often demand oil meeting a specific standard, like API SP or a manufacturer-specific code such as Dexos1 for GM vehicles.
Picking the right oil filter is just as important. Filters aren't universal, and getting the wrong one can cause all sorts of problems, from poor filtration and incorrect oil pressure to disastrous leaks. Your local auto parts store can easily look up your vehicle’s make, model, and year to find the exact filter you need.
This focus on using the right parts for the job is a core principle of good maintenance, whether you're working on your personal car or managing an entire business fleet. A comprehensive fleet maintenance checklist reinforces just how critical these details are for vehicle longevity. Getting these basics right builds good habits and ensures every job is done correctly from the start.
Gathering Your Tools and Preparing for the Job
Ask any seasoned DIYer, and they'll tell you the secret to a smooth oil change isn't about speed—it's all about preparation. Thinking you can just wing it is the fastest way to turn a simple task into a frustrating, messy ordeal with stripped bolts and oil spills.
Taking just a few minutes to gather everything you need beforehand makes the whole process faster, cleaner, and a lot safer. Let’s walk through what you should have ready before you even think about getting under the car.
The Essential Tool Checklist
Here’s a complete rundown of what you'll need to get the job done right on most vehicles. Think of this as your pre-flight checklist for a successful service.
- Wrench or Socket Set: You'll absolutely need the right size for your car’s drain plug. I always recommend a six-point socket over a 12-point. It grips the bolt head much more securely and seriously reduces the risk of rounding it off.
- Oil Filter Wrench: These come in a few different flavors, like cap-style, claw-style, or the classic band wrench. The best one for you depends entirely on where your filter is and how much room you have to work.
- Oil Drain Pan: Get a pan that can hold more oil than you think you need. Most cars use 4 to 6 quarts, but trucks and larger SUVs can easily hold 8 quarts or more. A little extra capacity prevents a messy overflow.
- Funnel: Don't even try to pour new oil without a clean, long-necked funnel. It’s a non-negotiable tool if you want to avoid pouring fresh oil all over your engine.
- Jack and Jack Stands: A good floor jack makes lifting the vehicle simple, but jack stands are the real heroes here. They are absolutely critical for your safety. Never, ever work under a car that's only held up by a jack.
- Wheel Chocks: This is a simple but crucial step. Chocks prevent the vehicle from rolling while you have it up in the air.
A few other things can make a world of difference, too. I always keep a roll of shop towels and a pair of nitrile gloves handy to keep my hands and my workspace clean.
Here’s a pro tip from years of experience: Before you start, put your socket on the drain plug and feel the fit. If it's loose or wobbly, stop and find one that fits snugly. This single step is the best way to avoid stripping that plug, which can turn a 30-minute job into an absolute nightmare.
Safety First, Always
Working under a vehicle comes with risks, but they are completely manageable if you take the right precautions. Your number one priority is creating a secure work environment. These steps are not optional.
First, find a flat, level surface. A garage floor or a level driveway is perfect. Trying to jack up a car on any kind of slope is asking for trouble—the jack or stands can shift and fail.
Next, make sure that car isn't going anywhere. If you’re lifting the front, put wheel chocks securely behind the rear tires. Once the car is lifted, gently lower it onto jack stands placed at the manufacturer's recommended lift points on the frame. Before you go anywhere near the underside, give the car a good, firm shake to be certain it's stable.
What About Engine Temperature?
People ask me all the time if the engine should be hot or cold for an oil change. The sweet spot is warm, not scorching hot.
Letting the engine run for just two or three minutes is perfect. This warms the oil just enough to thin it out, helping it drain faster and more completely. A hot engine, on the other hand, means you're dealing with dangerously hot oil and exhaust parts that can give you a nasty burn. A quick warm-up gets more of the old, dirty gunk out and makes your efforts that much more effective.
Draining Old Oil and Replacing the Filter
Alright, with your car prepped and your tools ready, it's time for the main event. This is where we get the old, contaminated oil out and swap in a fresh filter. I’ll walk you through it with some tips I've picked up over the years to help you dodge the common messes and headaches that can turn this job into a frustrating ordeal.
We'll cover the right way to drain the oil cleanly, how to tackle that filter (even if it's in a tight spot), and how to put it all back together without any leaks.
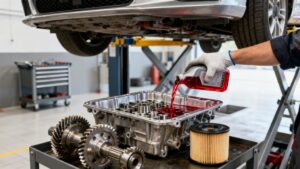
Draining the Old Engine Oil
First, slide your oil drain pan under the engine. Here's a pro tip: don't put it directly under the drain plug. Position it a little bit behind the plug. Warm oil doesn't just drip straight down; it comes out at an angle, especially at first. This simple shift is the difference between a clean job and an oil slick on your garage floor.
Grab the correct socket or wrench for your drain plug and give it a firm turn counter-clockwise. It might take a little muscle to break it loose. Once you do, you can usually unscrew it the rest of the way by hand. As you get to the last couple of threads, push the plug gently into the pan—this neat little trick stops oil from dribbling down your arm.
Then, in one quick motion, pull the plug away. Let the oil drain completely, which usually takes about 5-10 minutes. You'll see the stream go from a torrent to a trickle, and finally to a slow drip. While it drains, wipe the drain plug clean and check its gasket. If it looks cracked or flattened, replace it. A new washer costs almost nothing and is cheap insurance against a slow leak.
This image shows the basic tools you'll have laid out at this point, ready for action.
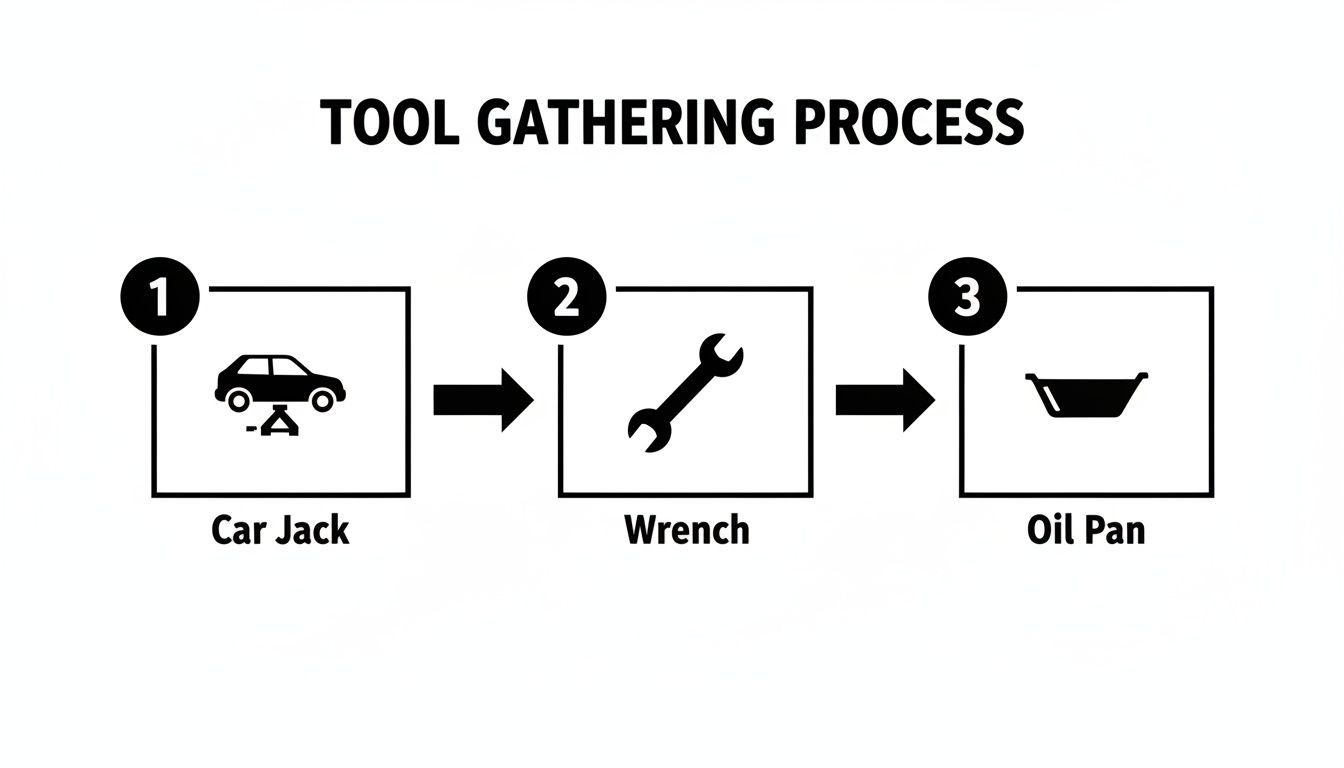
Having your jack, wrench, and pan in order sets you up for a smooth, efficient process right before you pull the plug.
Removing the Old Oil Filter
Once the oil has slowed to a drip, it’s time to deal with the filter. The location can vary a lot from car to car. Some are right there in plain sight, while others are tucked away and best reached from the top of the engine bay. A quick online search for your vehicle's make and model will pinpoint it for you.
Before you start twisting, place some cardboard or a few shop towels under the filter. Trust me, it's going to drip.
Now, grab your oil filter wrench. Depending on how much room you have, a cap-style wrench is often best, but a claw or strap wrench will also get the job done. Turn it counter-clockwise to loosen it. Just like the drain plug, it might be on there tight. Once it breaks free, you should be able to spin it off by hand.
Crucial Tip: The old filter is still full of used oil. As you unscrew it, try to keep it level. Once it’s off, carefully tip it over and empty the rest of the oil into your drain pan.
Ever wonder why that old oil is so dark? It’s because it’s been busy cleaning deposits and contaminants from inside your engine. If you're curious, you can learn more about what causes engine oil to turn black.
Installing the New Filter and Drain Plug
This is where attention to detail really matters. Getting this part right prevents leaks and protects your engine. Before you install the new filter, there are two small but critical things to do.
- Pre-fill the filter: Pour some fresh oil into the new filter, filling it about half-full. This helps prevent a "dry start," where the engine runs without oil pressure for a few seconds.
- Lube the gasket: Dip a clean finger in new oil and wipe a thin film over the new filter's rubber gasket. This ensures it seals smoothly and doesn't tear or bunch up when you tighten it.
Carefully thread the new filter on by hand, turning it clockwise until you feel the gasket make contact. From that point, tighten it another three-quarters of a turn by hand. Don’t be tempted to use a wrench unless the filter's instructions specifically say so. Over-tightening is a classic rookie mistake that can damage the seal.
Next, reinstall the drain plug. Always start it by hand to make sure you don’t cross-thread it. Once it's finger-tight, use your wrench to snug it up. The key word here is snug. You don't need to summon the strength of Thor. Over-tightening can strip the threads in your oil pan, which is a very painful and expensive fix. If you have a torque wrench, your owner's manual will give you the exact spec—usually around 25 ft-lbs.
With the new filter and drain plug in place, the dirtiest part of the job is behind you. You’re ready for the final step: adding the new oil.
Refilling With New Oil and Final Checks
Alright, you’ve drained all that old, dirty oil and spun on a fresh filter. You’re on the home stretch now, but don’t rush this part. Getting the new oil in correctly is just as critical as everything you've done so far.
The biggest mistake I see DIYers make is simply guessing how much oil to pour in. Too much oil can get whipped into a foam by the crankshaft, which is terrible for lubrication. Too little, and you risk starving the engine of oil, leading to catastrophic wear. Both are easy to avoid with a little care.
Finding Your Engine's Correct Oil Capacity
First things first, you need to know exactly how much oil your engine needs. Your owner's manual is the best place to find this. Just look up "Capacities" or "Engine Oil" in the index, and it will give you the precise amount, usually in quarts.
For example, a typical sedan might take 4.5 quarts, while a big truck could need 8 quarts or more. Never assume one car is the same as another.
No manual? No problem. A quick online search for your car's year, make, model, and engine size will get you the answer. Jot that number down—it’s your target.
The Art of the Clean Pour
Before you even think about pouring, do a quick but vital double-check. Make sure the drain plug is tight and the new oil filter is snug. A loose plug will create a messy, expensive puddle on your driveway in a hurry.
Now, locate the oil filler cap on top of your engine; it almost always has a little oil can symbol on it. Unscrew it and stick a clean funnel in the opening. Trust me, using a funnel is non-negotiable. It prevents spills and makes sure every drop of that new oil ends up where it belongs.
Here’s a pro tip I’ve learned over the years:
Don't just dump in the full amount all at once. If your car calls for 5 quarts, I always start by pouring in about 4.5 quarts. Holding back that last half-quart gives you a safety buffer to prevent overfilling.
Fixing an overfill is a real pain. You have to get back under the car and drain the excess. It’s always easier to add a little more oil than it is to take some out. To get a better handle on what you're pouring in, it's worth understanding what oil viscosity means and how it affects your engine.
How to Get an Accurate Dipstick Reading
After you've added most of the new oil, pull the funnel out and put the filler cap back on. Now, just wait a minute or two. This lets the oil you just poured settle down into the oil pan and is key for an accurate first reading.
Pull the dipstick out, wipe it completely clean with a rag, and push it all the way back in. Pull it out again and look closely at the tip. You’ll see two marks indicating "Full" and "Add." Your oil level should be somewhere between them.
Since you held back some oil, it will probably be below the "Full" line, which is exactly what we want. From here, add the oil in small amounts—just a few ounces at a time—rechecking the dipstick after each pour until you hit that "Full" mark. Patience is your friend here.
Final Checks and Resetting the System
With the oil level perfect, you're ready to wrap things up.
- Start the Engine: Make sure all your tools and rags are out of the engine bay, then fire up the car. Let it run for just 30 to 60 seconds. This is long enough to circulate the new oil and fill the filter.
- Inspect for Leaks: While it’s running, grab a flashlight and take a quick but careful look under the car. Check around the drain plug and the oil filter. If you spot any drips, shut the engine off immediately and give the leaky part a slight tighten.
- Final Level Check: Turn the engine off and wait about 5 minutes for the oil to drain back into the pan. Do one last dipstick check. The level might have dropped a little as the new filter filled up—that’s normal. Top it off if needed to bring it right back to the "Full" mark.
Once you’ve confirmed the oil level is perfect and there are no leaks, the very last step is resetting your car’s oil life monitor. The process is different for every vehicle, but it usually involves a few button presses on the dash or a menu option in the infotainment system. A quick search for your specific model will show you how it’s done. This ensures your car will give you an accurate heads-up for your next change oil and filter service.
Common Mistakes and When to Trust a Professional
Even with the best intentions, a simple weekend oil change can go south pretty quickly. What seems like a straightforward job can turn into a frustrating and expensive headache if you’re not careful. Knowing the common pitfalls is the best way to keep a 30-minute task from becoming a multi-day repair.
One of the easiest and most damaging mistakes I see is over-tightening the drain plug or oil filter. It feels like you’re being extra cautious, but you’re actually flirting with disaster by stripping the threads on your oil pan—a fix that can easily run you hundreds of dollars. Remember this: snug is good, but overtightening is disastrous. A torque wrench is your absolute best friend here.
Using the wrong type of oil is another classic blunder. Pouring a bottle of 10W-40 into a modern engine that calls for 0W-20 can mess with everything from your fuel economy to long-term engine health. Always, always double-check your owner’s manual for the right viscosity and certifications.
Classic DIY Blunders to Avoid
Let's walk through a few real-world screw-ups that can catch even the most careful person off-guard. A little foresight goes a long way.
- Forgetting to Lube the Gasket: When you screw on that new filter, its rubber gasket needs a thin coat of fresh oil. Skipping this step can cause the gasket to bind, tear, and create a serious leak as soon as you turn the key.
- The Dreaded Double Gasket: This one’s sneaky. Sometimes, the old filter’s gasket gets stuck to the engine block. If you don't spot it and install the new filter right over it, you’ve just guaranteed yourself a massive oil leak. Always make sure the old gasket came off with the old filter.
- Improper Jack Stand Use: Your safety is absolutely non-negotiable. Never, ever get under a car that’s only held up by a jack. A jack is for lifting, not supporting. Use properly rated jack stands on solid, level ground. A falling car is a fatal mistake.
I’ve heard more than a few horror stories of people pouring 5 quarts of fresh oil straight onto their garage floor because they forgot to put the drain plug back in. It sounds obvious, but when you're focused, it's an easy step to miss. Make it a habit: drain plug goes in before the new oil bottle is even opened.
Knowing When to Call a Professional
There's a lot of satisfaction in doing your own maintenance, but there’s no shame in knowing when to put the tools down. Pride has no place when your engine's health is on the line. Sometimes, the smartest move is handing the keys to a pro.
The first major red flag is a seized or stripped drain plug. If you’ve put a reasonable amount of force on that wrench and the plug isn’t budging—or worse, you feel the wrench starting to slip and round off the bolt head—stop. Just stop. Pushing it further will only make the problem worse. A professional has the right tools and experience to get it out without wrecking your oil pan.
Another serious warning sign is seeing metallic glitter in the old oil as it drains. A few microscopic specks might be normal, but if your drain pan looks like a failed art project, it's a huge indicator of serious internal engine problems. That’s a clear signal to get a professional diagnosis, not just an oil change.
Finally, just feeling out of your depth is a perfectly good reason to call it. If you're confused, unsure, or just worried you’ve messed something up, it's far smarter to get help.
When you bring your car in, a technician can perform a full-service oil change and also check for other underlying issues you might miss, like a fraying belt or the start of a new fluid leak. At the end of the day, trusting an expert is often the wisest decision you can make.
Common Questions About Changing Your Oil
Even after walking through the steps, it's natural to have a few questions, especially if you're tackling this job for the first time. Building confidence comes from getting clear answers, so let's cover some of the things we hear most often from car owners.
Can I Use a Different Oil Viscosity Than My Manual Recommends?
This is a big one, and the short answer is no. You should always stick to the manufacturer's recommended oil viscosity, whether that's 5W-30, 0W-20, or something else. Modern engines are built with incredibly tight tolerances, and that specific oil grade is what the engineers designed it to run on for proper lubrication and efficiency.
Think of your owner's manual as the ultimate source of truth for your vehicle. Using a different viscosity can mess with performance and lead to premature wear over time. It’s just not worth the risk.
What Happens If I Overfill My Engine With Oil?
Overfilling the oil can be just as bad as letting it run low. When the oil level is too high, the spinning crankshaft can whip it into a bubbly froth. Aerated oil is a terrible lubricant, and running your engine with it can cause serious wear and overheating.
Too much oil also creates excess pressure inside the engine, which can blow out seals and gaskets. That’s a recipe for messy, expensive leaks. If you accidentally add too much, you need to drain the extra oil right away to get the level back into the safe zone on your dipstick.
Is It Really Necessary to Change the Oil Filter Every Time?
Yes, absolutely. Your oil filter’s whole job is to trap all the nasty stuff—metal shavings, sludge, and other abrasive gunk—and keep it from circulating through your engine. Pouring fresh, clean oil into a system with a clogged, dirty filter completely defeats the purpose. It’s like taking a shower and then putting your dirty clothes back on.
A dirty filter simply can’t do its job. Worse, if it gets completely clogged, it can actually starve critical engine parts of the oil they need. A new filter costs next to nothing but provides essential insurance against major engine damage.
How Do I Dispose of Used Motor Oil and the Old Filter?
Used motor oil is considered hazardous waste, and you have to recycle it properly. It's illegal and terrible for the environment to pour it down a storm drain, on the ground, or just toss it in the trash.
Here’s how to do it the right way:
- Collect the Oil: Once you've drained the old oil into your pan, carefully pour it into a sealed container. The empty bottles your new oil came in work perfectly for this.
- Drain the Filter: Place the old filter upside down in your drain pan and let it sit for at least 24 hours. This gets as much of the trapped oil out as possible.
- Find a Recycling Center: Most auto parts stores and certified shops, including Kwik Kar, will accept used motor oil and filters for recycling, usually for free.
Taking these simple steps ensures your DIY project is good for your car and good for the environment.
Feeling a bit overwhelmed or just don't have the time? Let the certified technicians at Kwik Kar Oil Change and Auto Care handle it for you. We provide fast, professional service to keep your vehicle running like it should. Schedule your appointment online or just stop by our Fort Worth location today.