A solid brake rotor inspection is about more than just a quick glance. It involves a hands-on check of the rotor’s surface for any deep grooves, cracks, or discolored heat spots. After that, you need to pull out a micrometer and measure the rotor's thickness to make sure it’s still safely above the manufacturer's minimum spec. This simple process is your first line of defense in catching wear before it starts to impact your car's stopping power.
Why Your Brake Rotors Are So Important for Safety
Think of your brake system like a team. The brake pads get all the attention, but the rotors are where the real work happens. When you hit the brakes, the pads clamp down hard on these spinning metal discs, creating the friction that brings your car to a stop. If your rotors are in bad shape, it doesn't matter how new your brake pads are—they can't do their job. This can lead to dangerously long stopping distances, putting you in a tight spot when you least expect it.
For drivers here in Fort Worth, being proactive about your brakes isn't just good maintenance; it's essential for navigating our busy roads safely. Ignoring the warning signs won’t make them go away. It just leads to bigger, more expensive repairs and, more importantly, puts you and everyone else on the road at risk.
Recognizing the Early Warning Signs
Your car has its own way of telling you when the brakes need help. You just have to listen. Catching these signals early can save you a lot of headaches.
Keep an eye (and an ear) out for these common symptoms:
- A shaky steering wheel or vibrating brake pedal is a classic sign of warped rotors.
- Loud, grinding, or scraping sounds usually mean your brake pads are worn down to the metal and are now chewing into your rotors.
- A pulsating feeling in the brake pedal is another tell-tale sign that your rotors are worn unevenly.
These aren't just little quirks to ignore. They’re direct messages from your car telling you it's time to get your braking system checked out.
A proactive brake rotor inspection isn’t just about car maintenance—it’s about giving yourself peace of mind every time you get behind the wheel. Taking a few minutes to check them can prevent a dangerous situation and a massive repair bill.
This focus on safety is why the auto industry pours so much money into brake technology. Worn-out brake parts are a major cause of preventable accidents. In fact, the global market for automotive brake rotors is expected to hit USD 84.2 billion by 2035, largely because of stricter safety rules demanding better braking from every vehicle. You can read more about these automotive safety trends on Market Research Future. Learning how to inspect your own brake rotors is a powerful first step in making sure your car meets those critical safety standards.
Getting Your Tools Ready for a Safe Inspection
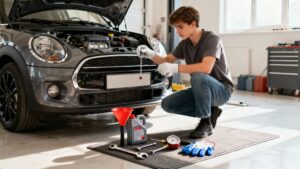
Before you even think about loosening a lug nut, let's talk about getting your gear in order. A successful—and safe—brake rotor inspection starts with having the right tools on hand. Trying to tackle this job without the proper equipment isn't just difficult; it's downright dangerous. Think of it as a pre-flight checklist. Every single item here is critical for getting the job done right and making sure you walk away in one piece.

The absolute bare minimum for this job is a reliable floor jack and—I can't stress this enough—a sturdy pair of jack stands. Please, never work on a vehicle that's only held up by a jack. Jacks can and do fail, and the results can be catastrophic. A solid set of jack stands is the most important piece of safety gear you'll own.
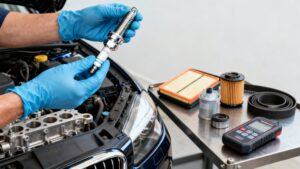
Essential Tools and Safety Gear
You don't need a professional-grade workshop, but a few key items are non-negotiable. Get these ready before you start, and the whole process will go a lot smoother.
- Lug Wrench: You'll need this to get the lug nuts off your wheels.
- Wheel Chocks: These are crucial for stopping the vehicle from rolling while you're jacking it up. Always wedge them behind the wheels that are staying on the ground.
- Torque Wrench: This is essential for putting your lug nuts back on correctly. Over-tightening can actually warp your new rotors, and under-tightening is a massive safety risk.
- Safety Glasses and Gloves: Brakes create a lot of dust, and metal edges can be sharp. Protect your eyes and hands.
Once you’ve got your tools, it’s time to lift the vehicle safely. Make sure you’re working on a flat, level surface like your garage floor or a paved driveway. Never attempt this on soft ground, grass, or an incline.
Here's a good rule of thumb I always follow: If the ground isn't level enough to park on without setting the emergency brake, it's definitely not level enough to work on. A stable foundation is where safety begins.
How to Safely Lift Your Vehicle
First, a pro tip: loosen the lug nuts on the wheel you're inspecting before you lift the car. It’s a whole lot harder to break them loose when the wheel is spinning freely in the air.
Next, find the vehicle's designated jack points. Your owner's manual will show you exactly where these reinforced spots on the frame are. Slide your floor jack under one of those points.
Lift the car just high enough to slip the jack stand underneath, placing it on a secure part of the frame right next to the jack. Then, slowly lower the jack until the car’s full weight is resting squarely on the stand. Before you do anything else, give the vehicle a firm shove to make sure it's completely stable. Only then should you finish removing the lug nuts and pull the wheel off to start your inspection. This simple routine is the bedrock of a safe and successful brake check.
What to Look for During a Visual Inspection
Once the wheel is off, you've got a clear shot of the brake rotor. This is your first and best chance to diagnose problems just by looking, and you don't need to be a seasoned mechanic to spot the major red flags.
The surface of the rotor tells a story. Ideally, you want to see a smooth, even finish, but let's be realistic—some minor imperfections are part of normal driving. What we're really hunting for are the signs of trouble that can compromise your stopping power and safety.
Spotting Deep Grooves and Scoring
One of the first things you’ll probably notice is scoring, which looks like fine lines or grooves running in a circle on the rotor’s face. Think of it like a vinyl record. Light, consistent lines are often just part of the deal. The real problem is when you find deep grooves—the kind you can easily catch with your fingernail. That's a bad sign.
Deep scoring is usually caused by brake pads that have worn down to their metal backing plate, which then starts grinding directly into the rotor. This carves out material, drastically reducing the surface area your pads can grip. Less grip means weaker, less reliable braking.
Here's a quick and easy "thumb test." Carefully run your thumb from the inside of the rotor to the outer edge. If it feels rough, uneven, or the grooves are deep enough to snag your skin, you're looking at significant wear.
This isn't just a cosmetic issue. Rotors with deep gouges have lost a lot of their stopping ability. It’s no surprise the global market for car brake rotors is expected to hit $26,090 million by 2031, almost entirely from replacements due to normal wear. You can dig into the growing brake rotor market and its trends on Valuates Reports. Learning to spot this wear yourself is the best way to stay ahead of problems.
To make it even easier, here's a quick checklist you can use when you're looking at your rotors.
Brake Rotor Visual Inspection Checklist
This table is a quick-reference guide to help you identify common brake rotor issues during your visual check and understand their severity.
| Visual Symptom | What It Looks Like | What It Means | Action Required |
|---|---|---|---|
| Deep Scoring | Pronounced grooves you can feel with a fingernail. | Brake pads are worn to the metal backing, grinding into the rotor. | Rotor needs to be resurfaced or, more likely, replaced. Replace pads too. |
| Heat Spots | Bluish or dark, discolored patches on the rotor surface. | Rotor has been repeatedly overheated from heavy braking. | Monitor closely. May lead to warping and vibration. Consider replacement if severe. |
| Hairline Cracks | Tiny, spider-web-like cracks, often near drilled holes. | Normal on some high-performance rotors due to heat cycles. | Usually acceptable, but monitor to ensure they don't grow. |
| Major Cracks | Any visible crack radiating from the center or edge. | Extreme stress and heat have compromised the rotor's integrity. | Immediate replacement is required. The rotor is unsafe to drive on. |
| Heavy Rust | Thick, flaking rust covering the braking surface. | Vehicle has been sitting for a long time or exposed to moisture. | Light surface rust is normal. Heavy, pitted rust means replacement. |
This checklist covers the big-ticket items. If you see any of the "Action Required" issues, especially major cracks, it's time to take it seriously.
Identifying Heat Spots and Cracks
Next up, scan the rotor's surface for any discoloration. If you see blotchy spots with a bluish or purplish tint, those are heat spots. They’re a tell-tale sign the rotor has been seriously overheated. This often happens from things like towing a heavy load or riding the brakes down a long, steep mountain pass.
When a rotor gets that hot, the metal can harden in spots, creating an uneven surface that causes brake pulsation and reduces the friction needed to stop. If you see heat spots, it’s a good idea to check your brake pads, too. Our guide on the signs of worn brake pads can help you figure out if they’re part of the problem.
Finally, and this is the most critical part, look for cracks. Check the entire surface, paying extra attention to the areas around the lug nut holes and along the outer edge.
- Hairline Cracks: On high-performance drilled or slotted rotors, you might see tiny surface-level cracks from all the heating and cooling. This can be normal.
- Significant Cracks: Any crack you can clearly see or feel is a massive safety hazard. A cracked rotor can completely fail under the intense pressure of a hard stop.
If you find a large crack, the inspection is done. That rotor must be replaced immediately—it is absolutely not safe to drive on. This quick visual once-over gives you a solid foundation before you even think about picking up a measuring tool.
Getting Serious: How to Measure Rotor Thickness and Runout
A good look at your rotors tells you part of the story, but some of the most critical rotor problems are completely invisible. I'm talking about issues like thinning metal and subtle warping—things that can seriously mess with your stopping power, even if the rotor looks perfectly fine. This is where we break out the tools and get some hard numbers.
Taking these measurements might sound a bit technical, but it's a straightforward process that gives you the data you need to make a safe call. We're going to focus on two key metrics: rotor thickness and lateral runout.
This quick visual guide sums up what you're looking for, from surface grooves and heat discoloration to dangerous cracks.

Think of it as a cheat sheet—it helps you quickly decide if you're looking at minor wear or a critical safety failure that needs immediate attention.
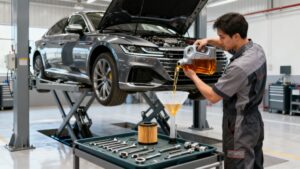
Checking Minimum Rotor Thickness
Every single brake rotor is manufactured with a "minimum thickness" specification. This isn't just a suggestion; it's the absolute limit at which the rotor is no longer thick enough to safely absorb and get rid of heat. You can usually find this spec stamped right on the rotor hub, often as "MIN TH" followed by a number, like MIN TH 26mm. If it's not there, your vehicle's service manual is your next stop.
To get an accurate measurement, you'll need a micrometer. A standard caliper just won't cut it here, as it will get hung up on the raised outer "lip" of the rotor, giving you a false reading of the actual braking surface.
- First, open up the micrometer and place it over the rotor's friction surface—the part the brake pad actually touches.
- Gently tighten the tool until you feel firm contact on both sides.
- It's a good idea to take readings at a few different spots around the rotor to catch any uneven wear.
If any measurement you take is at or below that stamped minimum thickness, that rotor's life is over. It needs to be replaced, no exceptions.
A rotor that's too thin can't handle the heat generated during a hard stop. This leads to severe brake fade—that terrifying feeling when your brakes temporarily stop working—or can even cause the rotor to crack or shatter under pressure.
Measuring Lateral Runout for Warping
"Lateral runout" is just the professional term for a warped rotor. It refers to a tiny side-to-side wobble as the rotor spins. You wouldn't be able to see it, but you can definitely feel it. Even a thousandth of an inch of runout can cause a noticeable vibration or pulsation in your brake pedal and steering wheel. If you've ever felt that shake, a warped rotor is almost always the culprit. For a deeper dive, check out our guide on what causes a car to shake while driving.
To measure this, you need a dial indicator with a magnetic base.
- Start by attaching the magnetic base to a solid, non-moving part of the suspension, like the steering knuckle or caliper bracket.
- Position the tip of the dial indicator so it's touching the flat face of the rotor, about half an inch from the outer edge.
- Press the tip in just a bit to preload it, and then set the gauge to zero.
- Now, slowly and smoothly turn the rotor by hand for one full 360-degree rotation.
- Keep your eye on the needle. The total amount it moves from its lowest to highest point is your runout measurement.
If that runout measurement exceeds 0.005 inches, the rotor is likely warped from heat, an issue that affects a staggering 30% of stop-and-go commuters. Another key metric is thickness variation; if it's over 0.001 inches, you're looking at a high risk of brake fade, which can reduce your grip by 25% after just 10 hard stops. While light grooves (under 0.020 inches) are often fine, anything deeper than 0.060 inches is a red flag that demands immediate replacement.
Making the Call: Resurface or Replace Your Rotors?
Alright, you've done the inspection and have the hard numbers. Now for the moment of truth: Do you get the rotors resurfaced, or is it time to just replace them? This decision isn't just about saving a few bucks—it's about your safety and your car's future performance. The right choice really hinges on the rotor's current condition and that all-important thickness measurement.

Resurfacing, sometimes called "machining" or "turning," is basically shaving a super-thin layer of metal off the rotor's surface. The goal is to get it back to a perfectly flat, smooth finish. It’s a great fix for minor problems like light scoring, a tiny bit of runout, or those annoying brake pad deposits.
But here’s the catch: resurfacing is only on the table if the rotor has enough metal left to work with. Every time a rotor goes on a lathe, it gets thinner. If machining it down would take the thickness below the stamped minimum thickness specification, then it's a definite no-go. Safety first.
When Resurfacing Is a Good Option
Think of resurfacing as giving your rotors a second chance. It can be a smart, cost-effective move in the right situation, helping you get a bit more life out of them without cutting corners on safety.
You can probably get away with resurfacing if your inspection turned up:
- Minor Grooves: The surface has some light scoring, but nothing deep enough that your fingernail gets stuck in it.
- Mild Vibration: You measured a tiny bit of lateral runout, something well within a correctable range (usually under 0.005 inches).
- Plenty of Thickness: Your micrometer reading is comfortably above that minimum thickness spec, leaving plenty of material for a machine to safely shave off.
Just keep in mind, resurfacing is a temporary fix. A resurfaced rotor will always be thinner and more prone to heat-related warping down the road. It's a solid way to save some money now, but don't be surprised if it doesn't last as long as a brand-new part.
When Replacement Is the Only Choice
Sometimes, it’s not even a debate. Certain issues make a rotor flat-out unsafe, and replacement is the only responsible call. Forget about the cost for a second—your brakes are the last place you should ever try to cut corners.
You must replace your brake rotors if you find any of these red flags:
- Cracks: Any crack you can see, no matter how small, means the rotor’s structural integrity is shot. It has to be replaced, period.
- Below Minimum Thickness: If the rotor is already at or below the minimum spec, it can no longer handle heat safely. It’s done.
- Severe Warping: A lot of runout or deep, discolored heat spots mean the metal has been permanently changed by extreme heat. Shaving it down won't fix the underlying damage.
Honestly, in today's market, high-quality replacement rotors are often more affordable than you'd expect. When you factor in the cost of labor for resurfacing and the fact that a new rotor gives you maximum heat dissipation and a longer service life, replacement is usually the smarter long-term investment. It gives your brake system a fresh start, ensuring you have the stopping power you need and peace of mind on the road.
When to Trust the Professionals at Kwik Kar
Knowing your own limits is the smartest part of any DIY job. While inspecting your own rotors can be empowering and save you a few bucks, there are definitely times when you need to hand the keys to a certified technician for their precision and experience.
If you’ve gone through the checks but still have a nagging feeling of uncertainty about what you’re seeing, that’s your cue. It’s always better to get a professional opinion than to second-guess a critical safety component.
The same goes for persistent symptoms. Let's say you've inspected your rotors, and they look fine on the surface, but you're still dealing with that annoying vibration, grinding noise, or a spongy brake pedal. That’s a huge red flag that something deeper is wrong within the brake system. Don’t keep guessing when your safety is on the line.
Why a Professional Second Look Matters
Bringing your car into Kwik Kar means an ASE-certified technician can confirm your findings—or spot something you might have missed. We use highly accurate diagnostic equipment that goes far beyond what most people have in their home garage. This is especially true if you don't own tools like a dial indicator or a micrometer.
Think of it as a partnership. You do the initial check to stay informed about your vehicle, and we provide the expert confirmation to make sure the job is done right.
Ultimately, if the idea of making a mistake on your brakes makes you even a little bit uneasy, trust that instinct. Our team is here to give you clarity and provide expert service. You can learn more about what our full brake service includes and let us give you total peace of mind on the road.
Still Have Questions About Brake Rotor Inspections?
Even the most straightforward guides can leave you with a few lingering questions, especially when you're getting your hands dirty. It’s totally normal. Let's walk through some of the most common things people ask, so you can feel 100% confident when you're checking out your brakes.
Getting these details right is the difference between just following a checklist and truly understanding what’s happening with your car.
How Often Should I Be Looking at My Brake Rotors?
A good rule of thumb is to give your rotors a quick visual check every time you rotate your tires—that’s about every 5,000 to 7,500 miles. This is the perfect opportunity to spot early signs of trouble before they turn into bigger headaches.
You'll want to do a more detailed inspection, complete with measurements, whenever you're swapping out brake pads. Of course, if you feel any vibration or hear any squealing or grinding, that’s your car telling you to take a closer look right away. For those of us stuck in stop-and-go traffic all the time, sneaking a peek during every oil change is a smart move.
Is It the Same Process for Front and Rear Rotors?
For the most part, yes. If your car has disc brakes on all four wheels, the inspection process is identical. You'll use the same visual checks and the same tools to measure thickness and runout on both the front and rear rotors.
The key difference isn't in the how, but in the when. Your front brakes do most of the heavy lifting—sometimes up to 70% of the stopping force—so they tend to wear out much faster. Also, don't forget that some vehicles, especially older models and many trucks, still use drum brakes in the back. That's a completely different system and requires its own unique inspection process. If you’re not sure what you’ve got, we can tell you in a flash.
Don't be surprised if your front rotors need replacing while the rears still have plenty of life left. That's completely normal and just a sign they're doing their job.
OEM or Aftermarket Rotors: Which Should I Choose?
Ah, the classic debate. There are good arguments for both sides. OEM (Original Equipment Manufacturer) rotors are exact duplicates of what your car came with from the factory. You're guaranteed a perfect fit and the performance you're used to.
Aftermarket rotors, on the other hand, can be a mixed bag. Some high-end brands are engineered to meet or even beat OEM standards, offering fantastic performance. But there are also plenty of budget options made from lower-quality materials that might wear out or warp prematurely. Our advice? Always go with high-quality parts that meet OEM specs. Your safety, and the safety of your passengers, depends on it.
If you’ve gone through the inspection and you're still not sure what you're seeing, or you'd just rather leave it to a professional from the start, Kwik Kar Oil Change and Auto Care is here to help. Our certified technicians have the right tools and years of experience to give you a definitive answer. Schedule your brake service with us today and get back on the road with complete confidence.